Understanding your dummy security camera's power needs is essential for successful installation outlined in the Dummy Camera Bracket Installation Guide. Choose a power source based on indoor/outdoor setup, hardwiring, solar power, or wireless options, considering total power draw. The guide provides detailed steps for bracket installation, camera mounting, and maintenance tips including cleaning, connection checks, and troubleshooting to ensure optimal system performance.
In today’s digital era, enhancing home security has never been more straightforward. This comprehensive guide delves into the essential aspects of dummy security camera power options, serving as your Dummy Camera Bracket Installation Guide. Understanding the power requirements of these devices is crucial for seamless integration and longevity. From selecting the right power source to a step-by-step installation process and maintenance tips, this article equips you with all you need to know for successful dummy camera bracket setup.
- Understanding Dummy Security Camera Power Requirements
- Choosing the Right Power Source for Your Dummy Camera Bracket
- Installation Process: Securing and Mounting the Dummy Camera
- Maintenance and Troubleshooting Tips for Longevity
Understanding Dummy Security Camera Power Requirements
Understanding your dummy security camera’s power requirements is a key step in ensuring smooth operation and optimal placement during the Dummy Camera Bracket Installation Guide. These cameras, designed to mimic real surveillance equipment, often run on standard household current, typically drawing a relatively low amount of power. Most models will specify their power needs in watts, making it easy to match with suitable power sources.
When selecting a power option, consider both the camera’s instantaneous power draw and any additional components connected to its circuit, such as motion sensors or LED indicators. Ensure your chosen power supply can handle these combined demands without overloading, especially if you’re installing multiple cameras in close proximity. This careful consideration will guarantee your dummy security system functions reliably and efficiently.
Choosing the Right Power Source for Your Dummy Camera Bracket
When setting up a dummy camera bracket, selecting the appropriate power source is a crucial step in your Dummy Camera Bracket Installation Guide. The power option you choose should align with your specific needs and the location of your bracket. If the camera is placed indoors, a hardwired connection might be ideal for a consistent power supply. This method provides reliable footage without worrying about battery life or power outages.
For outdoor installations, consider using solar-powered dummy cameras. This eco-friendly option harnesses the sun’s energy, making it suitable for remote areas with limited access to electrical outlets. Solar panels charge a built-in battery, ensuring your camera stays operational even in varying weather conditions. Additionally, wireless power solutions like rechargeable batteries or POE (Power over Ethernet) adapters offer flexibility and convenience, especially when installation requires some creativity to reach an electrical source.
Installation Process: Securing and Mounting the Dummy Camera
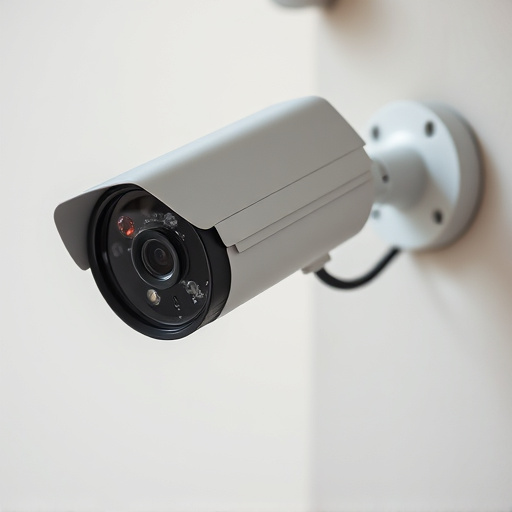
The installation process for a dummy security camera begins with securing and mounting the camera using a bracket designed specifically for the purpose. Start by choosing an ideal location—a spot that offers unobstructed views of the area you wish to monitor, whether it’s your home entrance, backyard, or business premises. Ensure the surface is clean and dry before attaching the Dummy Camera Bracket. This guide provides step-by-step instructions on how to secure the bracket firmly in place using appropriate tools and hardware.
Once the bracket is securely fastened, carefully mount the dummy camera onto it. Align the camera correctly, ensuring its field of view matches your surveillance needs. The process involves simple adjustments to ensure the camera captures high-quality footage without any obstructions or blind spots. With a few final touches, your dummy security camera will be operational and ready to deter potential intruders while providing peace of mind.
Maintenance and Troubleshooting Tips for Longevity
Regular maintenance is key to ensuring your dummy security camera system lasts for years. Start with a thorough cleaning of all components, especially the lenses and sensors, using compressed air or a soft cloth to remove dust and debris. Check connections regularly, tightening any loose cables or plugs, and inspect the power supply unit for signs of damage or corrosion. A well-maintained system will perform better and require fewer replacements over time.
When troubleshooting issues, begin with simple checks: verify power is reaching each camera by examining the connection to the power strip or battery pack; ensure cameras are properly aligned and receiving clear signals; and check if any sensors or motion detectors are functioning correctly. For more complex problems, refer to the dummy camera bracket installation guide or seek manufacturer support. Regular care and prompt addressing of issues will keep your security system operational and effective.
When it comes to installing a dummy security camera bracket, understanding your power options is key. This comprehensive guide has walked you through the essential steps, from matching the right power source for your bracket to ensuring optimal longevity through maintenance tips. By following this Dummy Camera Bracket Installation Guide, you’re now equipped to securely and effectively mount your dummy camera, enhancing your home or business’s security with ease.