Dummy Camera Brackets are essential for enhancing security systems by offering strategic mounting solutions. An installation guide provides practical tips for optimal camera placement, improving visibility and coverage of blind spots. These weatherproof brackets ensure a secure foundation, deterring intruders while fostering situational awareness. When installing, prioritize visibility and accessibility, follow the guide for bracket selection and positioning, and regularly clean and inspect the camera system for optimal performance.
“Enhance your home or business security with our comprehensive guide to Dummy Camera Bracket Installation. Learn how these versatile brackets serve as a cost-effective deterrent, mimicking real cameras without breaking the bank. Discover the ideal placement strategies for maximum impact and peace of mind. Our step-by-step process ensures easy installation, while post-install tips and maintenance guidelines guarantee longevity. Get started today with this essential Dummy Camera Bracket Installation Guide.”
- Understanding Dummy Camera Brackets: Their Role and Benefits
- Choosing the Right Location for Installation: Factors to Consider
- Step-by-Step Dummy Camera Bracket Installation Process
- Post-Installation Tips and Maintenance Guidelines
Understanding Dummy Camera Brackets: Their Role and Benefits
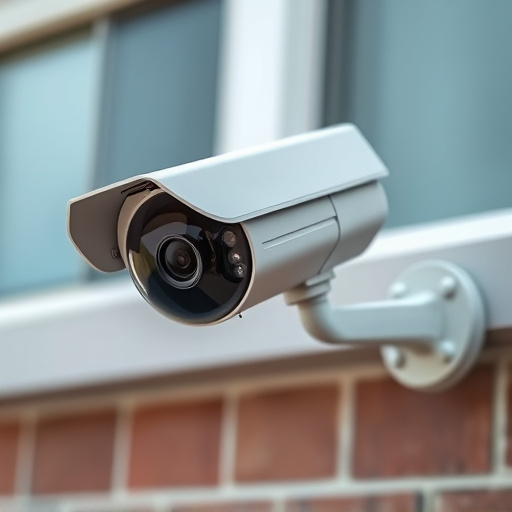
Dummy camera brackets are an essential component in the world of security camera installations, especially for those looking to create a comprehensive surveillance system. These brackets serve as a supportive structure, allowing for the secure mounting of security cameras at various angles and heights. The primary role of a dummy bracket is to provide a fixed position for the camera, ensuring optimal visibility while also protecting the camera from potential damage or theft.
For homeowners and businesses alike, a Dummy Camera Bracket Installation Guide can be a valuable resource. By following these guides, individuals can easily install brackets that enhance the overall security setup. Benefits include improved situational awareness, as they enable strategic placement of cameras to cover blind spots, and deterring potential intruders. Additionally, dummy brackets are often designed with weatherproof materials, making them suitable for both indoor and outdoor environments, ensuring a reliable and durable solution for your security camera system.
Choosing the Right Location for Installation: Factors to Consider
When selecting a location for your security camera with lights, consider both visibility and accessibility. Opt for areas with ample natural or artificial light to ensure clear, well-lit footage during all hours. A good rule of thumb is to position cameras at eye level or slightly elevated—this angle provides the broadest field of view and reduces the risk of blind spots.
Additionally, choose spots that are easily visible from your home or business premises. Consider strategic locations near entry points, such as front doors or windows, garage entrances, or any other high-risk areas. Refer to a Dummy Camera Bracket Installation Guide for physical placement tips and ensure the camera has unobstructed viewlines to capture clear images effectively.
Step-by-Step Dummy Camera Bracket Installation Process
Installing a dummy camera bracket is a straightforward process that can enhance your security system’s aesthetic appeal. Here’s a step-by-step Dummy Camera Bracket Installation Guide to ensure it’s done correctly. Begin by selecting the appropriate bracket for your camera model, ensuring it fits seamlessly with your existing setup. Next, locate the ideal mounting position—a secure, level surface is key. Use a level to verify the bracket’s positioning before proceeding.
With the right placement confirmed, attach the bracket using the provided hardware. Securely fasten the screws, following the manufacturer’s instructions for the best results. Once secured, gently slide your camera into the bracket, aligning it precisely. Double-check the camera’s stability and adjust the bracket if needed. Now, with your dummy camera bracket successfully installed, you’ve not only added a professional touch to your security setup but also ensured optimal visibility for potential intruders.
Post-Installation Tips and Maintenance Guidelines
After successfully installing your security camera shell with lights, there are a few key tips to ensure optimal performance and longevity. One crucial aspect is regular cleaning of the cameras and lighting fixtures. Dust and debris can accumulate over time, affecting image quality. Use a soft cloth or brush to gently wipe down the exterior, being careful not to obstruct any lenses or sensors.
Additionally, periodic calibration of the camera angle and zoom settings is essential. Ensure the dummy camera bracket installation guide is followed during initial setup for accurate positioning. Regularly check connections and power sources to prevent any disruptions. Keep an eye out for loose components or signs of damage, addressing these issues promptly to maintain a robust security system.
A dummy security camera shell with lights not only enhances your home or business’s exterior aesthetics but also serves as a powerful deterrent for potential intruders. By following our comprehensive Dummy Camera Bracket Installation Guide, you can easily set up this device, providing a sense of safety and peace of mind. Remember to regularly inspect and maintain your bracket to ensure optimal performance and longevity. Stay protected, stay informed!