An outdoor dummy camera installation is a cost-effective crime deterrent for homes and businesses. To maximize its effectiveness, strategically place the camera near entry points or high-traffic areas at eye level with a clear view, secure it weatherproofly, and maintain realism by including a reflective object or dummy camera inside. Follow these steps: choose a location, attach the housing securely, connect power and data, configure settings for motion detection and recording, regularly test, clean, inspect connections, and adjust for seasonal changes to ensure optimal performance and longevity of your outdoor dummy security camera system.
“Uncover the power of deterrence with outdoor dummy camera installation! This comprehensive guide explores the world of empty security camera housing units, offering a cost-effective way to enhance home and business safety. From understanding these units’ benefits to choosing the ideal location and learning simple installation steps, you’ll discover how to effectively deploy these fake cameras. Maintain their longevity with practical tips, ensuring your outdoor dummy camera installation is both functional and impactful.”
- Understanding Empty Security Camera Housing Units
- Benefits of Outdoor Dummy Camera Installation
- Choosing the Right Location for Your Dummy Camera
- Step-by-Step Guide to Installing an Outdoor Dummy Camera
- Maintenance and Tips for Longevity of Your Dummy Security Camera
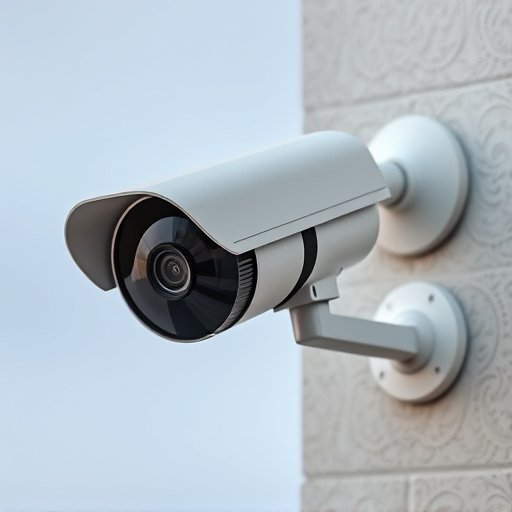
Understanding Empty Security Camera Housing Units
Empty security camera housing units, often referred to as dummy or mock cameras, are a popular choice for deterring crime in both residential and commercial settings. These devices serve as visual deterrents, misleading potential intruders into believing that a real security system is in place. Understanding how to properly install an outdoor dummy camera is crucial for maximizing its effectiveness.
The installation process typically involves several simple steps. First, locate the desired placement for the housing unit, ensuring it’s in a visible location where it can clearly mimic a real camera. Then, securely attach the housing to a suitable surface using screws or adhesive designed for outdoor use. Next, position a dummy camera or even a simple reflective object inside the housing to create the illusion of an active surveillance system. Finally, ensure proper lighting and visibility around the area to enhance the realistic appearance of your outdoor dummy camera installation.
Benefits of Outdoor Dummy Camera Installation
An Outdoor Dummy Camera Installation offers numerous benefits for homeowners and businesses alike, serving as a powerful deterrent against potential intruders. These realistic-looking camera units are designed to mimic real security cameras, tricking would-be thieves into believing your property is under constant surveillance. This simple yet effective strategy can significantly reduce break-in attempts and create the illusion of enhanced security.
The installation process for outdoor dummy cameras is straightforward and often involves mounting the unit on exterior walls or visible areas where a genuine camera might be placed. By following detailed Outdoor Dummy Camera Installation Steps, you can ensure proper placement, ensuring maximum effectiveness. This cost-effective solution provides peace of mind, adds an extra layer of protection, and could even deter criminal activity before it occurs.
Choosing the Right Location for Your Dummy Camera
When installing an outdoor dummy camera, selecting the optimal location is a crucial step in the process. The chosen spot should offer clear visibility and be strategic for deterring potential intruders. Consider placement near entry points like doors, windows, or areas with high foot traffic. Ensure it’s visible enough to act as a deterrent without being too obvious, thus maintaining an element of surprise.
Follow recommended outdoor dummy camera installation steps by securing the device firmly in a weatherproof housing. Positioning it at eye level and slightly angled downwards provides the best field of view. Avoid placing it where it can be easily shined upon or blocked, as this reduces its effectiveness as a security measure.
Step-by-Step Guide to Installing an Outdoor Dummy Camera
Installing an outdoor dummy camera can be a straightforward process, providing an effective deterrent to potential intruders. Here’s a step-by-step guide to ensure a successful and secure setup:
1. Choose Your Location: Select a strategic spot for your dummy camera. It should offer a clear view of the area you wish to monitor, preferably at eye level or slightly elevated to capture a broader field of vision. Ensure it’s positioned where it won’t be easily obscured by trees, buildings, or other obstructions.
2. Prepare the Housing: Remove any packaging and assemble the dummy camera housing if necessary. Place it securely in the chosen location, ensuring it’s firmly attached to a wall or pole using the provided mounting hardware. Some models may require drilling holes for screws, while others use adhesive or quick-release mounts.
3. Connect Power and Data: Plug in the power supply and connect the camera to your network. Many modern dummy cameras are wireless, allowing for easy setup and remote access via a mobile app or web portal. Follow the instructions provided by the manufacturer for specific connectivity options and ensure the camera is connected to your home network securely.
4. Configure Settings: Access the camera’s settings and customize them according to your needs. This includes setting up motion detection sensitivity, recording schedules, and cloud storage preferences. Ensure the camera captures high-quality footage suitable for recognition and detailed observation.
5. Test and Adjust: Once installed, test the camera’s functionality. Check its field of view, motion detection range, and audio quality. Make adjustments as needed to ensure optimal performance. Regular testing will help maintain the camera’s effectiveness over time.
Maintenance and Tips for Longevity of Your Dummy Security Camera
Proper maintenance is key to ensuring your outdoor dummy camera installation steps translate into a long-lasting, effective security solution. Regular cleaning and inspection are crucial; remove any dust or debris that might accumulate over time, as even small obstructions can affect its performance. Use a soft cloth and mild detergent for cleaning, avoiding harsh chemicals that could damage the housing. Inspect all connections, including power cables and data cords, checking for any signs of wear or tear. Secure loose parts and ensure all screws are tightly fastened to prevent environmental elements from compromising the unit’s integrity.
Consider seasonal adjustments as well; in colder climates, take precautions to prevent freezing. Use heat packs or leave the camera on during extreme temperatures to keep it operational. Conversely, protect against excessive sunlight by providing some shade, as direct exposure can lead to faster degradation of components over time. Regular maintenance and these simple tips will help extend the life of your dummy security camera, ensuring its ongoing effectiveness in safeguarding your property.
Empty security camera housing units, while seemingly mundane, serve as a powerful deterrent in outdoor spaces. By installing an outdoor dummy camera, you not only enhance security but also contribute to a safer environment. Following the detailed guide on Outdoor Dummy Camera Installation Steps and maintaining your unit properly will ensure its longevity and effectiveness in deterring potential intruders. Remember, even a dummy camera can play a crucial role in protecting what matters most.