The Dummy Camera Bracket Installation Guide is a comprehensive resource for integrating solar-powered dummy security cameras into surveillance systems. It provides step-by-step instructions on mounting cameras at optimal angles for sunlight exposure and night-time coverage, ensuring efficient charging and effective monitoring without battery changes or complex wiring. By selecting a well-lit location with clear visibility and minimal obstructions, users can maximize the camera's effectiveness. The guide outlines a simple 6-step process for installing the bracket and mounting the camera securely, enhancing home or business security discreetly. Proper maintenance, including regular cleaning and checks, extends the lifespan and optimal performance of these solar-powered cameras.
“Revolutionize your home security with solar-powered dummy security cameras—a game-changer in outdoor surveillance. This comprehensive guide explores the benefits of these eco-friendly devices, offering a cost-effective and efficient solution for homeowners. From understanding their operation to choosing the perfect installation location, we cover it all. Learn how to set up a dummy camera bracket with our step-by-step guide, ensuring optimal performance. Additionally, discover maintenance tips to keep your solar dummy cameras reliable and long-lasting.”
- Understanding Solar-Powered Dummy Security Cameras: A Comprehensive Overview
- Benefits of Using Solar Dummy Cameras for Home Security
- Choosing the Right Location for Camera Installation: Tips and Tricks
- Step-by-Step Guide to Installing a Dummy Camera Bracket
- Maintenance and Care: Ensuring Your Solar Dummy Cameras Last
Understanding Solar-Powered Dummy Security Cameras: A Comprehensive Overview
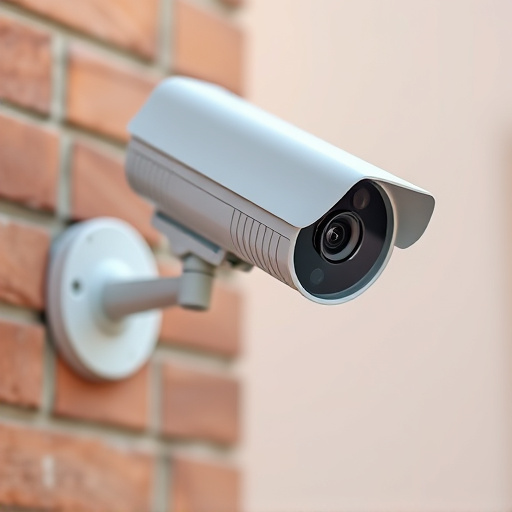
Solar-powered dummy security cameras are an innovative and eco-friendly addition to any home or business’s security system. These devices offer a unique blend of sustainability and surveillance, ensuring peace of mind while reducing environmental impact. Comprising a sturdy camera housing designed to resemble a real security camera, solar panels for power generation, and a rechargeable battery, they seamlessly integrate into existing security setups.
The Dummy Camera Bracket Installation Guide plays a pivotal role in setting up these cameras effectively. It provides step-by-step instructions on mounting the camera at optimal angles, ensuring sunlight exposure for efficient charging during the day while offering strategic placement to maximize surveillance coverage at night. This guide ensures users can take full advantage of solar power and achieve comprehensive security monitoring without the need for frequent battery replacements or complex wiring.
Benefits of Using Solar Dummy Cameras for Home Security
Solar-powered dummy security cameras offer an innovative and eco-friendly approach to home security. One of their key advantages is the convenience they provide for homeowners, as they eliminate the need for frequent battery replacements or complex wiring. With solar energy absorption, these cameras are designed to operate autonomously, drawing power from sunlight during the day and ensuring continuous surveillance without interruption.
Additionally, dummy camera bracket installation guides ensure that these security devices can be easily and discreetly placed around your property. Their visual presence alone serves as a powerful deterrent against potential intruders, providing peace of mind for homeowners and enhancing overall home security without requiring extensive setup or maintenance.
Choosing the Right Location for Camera Installation: Tips and Tricks
When setting up a solar-powered dummy security camera, selecting the optimal location for installation is crucial for its effectiveness and longevity. The key is to find a spot that offers clear visibility while being discreet, ensuring it blends seamlessly into the environment. Look for areas with minimal obstructions, such as tall trees or buildings, which could block the camera’s view. Ideally, the camera should have a direct line of sight to the areas you want to monitor.
Consider factors like sunlight exposure; place the camera where it receives ample natural light for efficient solar charging. A sturdy and secure mounting point is essential. Use a durable dummy camera bracket that can withstand outdoor conditions. Ensure the bracket is installed correctly, following a detailed Dummy Camera Bracket Installation Guide, to avoid any potential damage or tampering attempts.
Step-by-Step Guide to Installing a Dummy Camera Bracket
Installing a dummy security camera bracket is a straightforward process that can enhance your home or business’s security in no time. Here’s a step-by-step guide to ensure a hassle-free setup:
1. Choose the Right Location: Select a spot where you want to place the dummy camera. Ensure it’s visible enough to deter potential intruders, yet discreet enough not to draw unnecessary attention. Also, consider proximity to an electrical outlet for power supply.
2. Gather Your Tools and Materials: You’ll need a drill with appropriate bits, a level, measuring tape, screws suitable for your bracket, and the dummy camera bracket itself. Make sure all components are compatible with your solar-powered security camera.
3. Mark the Mounting Points: Using the level, mark where the screws will go. It’s crucial to ensure the bracket is straight and secure. Use the measuring tape to verify the distance between mounting points for accurate alignment.
4. Drill the Holes: With the marks made, drill pilot holes through the bracket and into the surface. This prevents crack propagation and facilitates smooth screw insertion. Be careful not to over-drill or damage the surface.
5. Attach the Bracket: Place the dummy camera bracket on the marked spots and secure it with screws. Ensure all screws are tightened evenly for stability. Double-check the level again to confirm alignment.
6. Mount Your Solar-Powered Camera: Once the bracket is firmly in place, attach your solar-powered security camera according to the manufacturer’s instructions. Align the camera correctly so it captures the intended area effectively.
Maintenance and Care: Ensuring Your Solar Dummy Cameras Last
Proper maintenance and care are essential to ensuring your solar dummy security cameras last for years to come. Starting with installation, it’s crucial to follow a Dummy Camera Bracket Installation Guide to ensure the camera is securely mounted and aligned correctly. This not only enhances its functionality but also prolongs its lifespan by preventing damage from weather exposure or theft.
Regular cleaning of the solar panel and lens is vital to maintain optimal performance. Dust, dirt, and debris can significantly reduce energy absorption and picture quality. Use a soft cloth and mild detergent for gentle cleaning. Additionally, periodic checks for any loose connections or signs of wear and tear are recommended. Quick action on minor issues can prevent major repairs later on. Remember, proper upkeep is key to harnessing the full potential of your solar-powered security system.
Solar-powered dummy security cameras offer an eco-friendly, cost-effective solution for home protection. By harnessing the sun’s energy, these devices provide a continuous surveillance network with minimal maintenance. With proper installation, as outlined in our Dummy Camera Bracket Installation Guide, and regular care, you can enjoy enhanced peace of mind knowing your property is secured. Embrace this innovative technology to safeguard your space efficiently and sustainably.