Dummy security dome cameras, though lacking active sensors and recording capabilities, offer a cost-effective way to enhance surveillance for homes and businesses. A crucial component is the Dummy Camera Bracket Installation Guide, which facilitates precise placement and stability. When selecting a bracket, consider adjustable mounting options, secure fastening mechanisms, weatherproofing, realistic design, pre-drilled holes, threaded inserts, adjustable camera angle adjustments, and weight capacity. Follow the guide for optimal deployment, maintain regular cleaning and security checks, and update firmware to ensure peak performance.
“Uncover the power of dummy security dome cameras, essential additions to any home or business’s surveillance system. This comprehensive guide explores the fundamentals, from understanding their basic functions to dissecting key components that ensure optimal performance. We delve into the art of selecting the perfect dummy camera bracket—a crucial component for seamless installation. Follow our step-by-step dummy camera bracket installation process and discover maintenance tips to keep your security system functioning at its peak.”
- Understanding Dummy Security Dome Camera Basics
- Key Features and Components of a Dummy Camera
- Choosing the Right Dummy Camera Bracket
- Step-by-Step Dummy Camera Bracket Installation Process
- Maintenance Tips for Optimal Performance
Understanding Dummy Security Dome Camera Basics
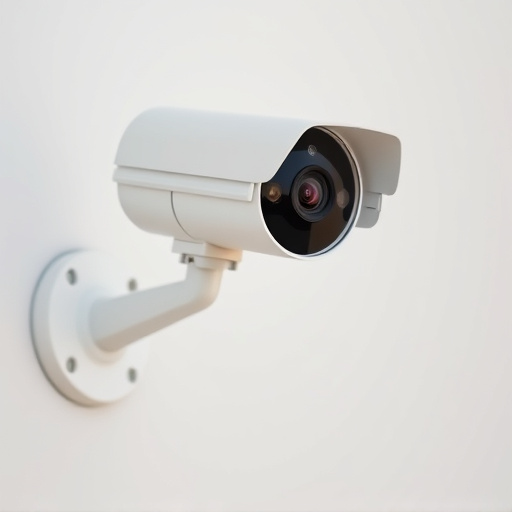
Dummy security dome cameras are a popular choice for homeowners and businesses looking to enhance their surveillance system without the cost and complexity of traditional cameras. Understanding the basics of these devices is essential when considering an upgrade or installation. A dummy camera, as the name suggests, mimics the appearance of a real security camera but does not contain any active sensors or recording capabilities. This makes them an affordable option for deterring potential intruders without the need for extensive wiring or complicated setup processes.
When it comes to purchasing and installing a dummy security dome camera, a comprehensive Dummy Camera Bracket Installation Guide is invaluable. This guide typically covers crucial aspects such as choosing the right bracket to secure the camera, positioning it at optimal angles for maximum visibility, and ensuring proper alignment with real surveillance cameras in your system (if applicable). Following these instructions carefully can help you create an effective deterrence strategy while maintaining a seamless aesthetic.
Key Features and Components of a Dummy Camera
A dummy security dome camera, often used for deterrence or as a part of an integrated surveillance system, boasts several key features that set it apart. These devices typically include advanced motion detection technology, capable of distinguishing between human movement and environmental factors like animals or changing weather conditions. High-definition video quality, ranging from 720p to 4K resolution, ensures clear images day or night, while infrared lighting enables visibility in complete darkness.
The components of a dummy camera encompass more than just the housing and lens. A robust Dummy Camera Bracket Installation Guide is essential for proper placement and stability. These brackets allow for adjustable positioning, ensuring optimal field of view. Internal memory or support for external storage ensures uninterrupted monitoring with options for local or cloud-based data retention. Additionally, weatherproofing features protect against outdoor elements, making them suitable for a variety of installations.
Choosing the Right Dummy Camera Bracket
When selecting a dummy camera bracket, consider your installation needs and preferences. The right bracket should offer adjustable mounting options, ensuring compatibility with various pole or wall diameters. Look for models with secure fastening mechanisms to prevent theft or damage. A well-designed bracket will also include features like weatherproofing and a realistic design to blend seamlessly into the environment.
For an efficient Dummy Camera Bracket Installation Guide, choose brackets with pre-drilled holes and threaded inserts for easy mounting. Some advanced options may include adjustable camera angle adjustments, allowing you to customize the field of view. Ensure the bracket’s weight capacity matches your camera’s specifications to avoid any instability issues.
Step-by-Step Dummy Camera Bracket Installation Process
Setting up a dummy security dome camera involves a straightforward process, especially with the right bracket installation guide. Here’s a step-by-step approach to ensure your dummy camera is securely and optimally positioned:
1. Preparation: Begin by gathering all necessary tools – this typically includes your dummy camera, bracket, screws, and a screwdriver. Ensure your workspace is clear of obstructions for a smooth installation.
2. Choose the Ideal Location: Identify where you want to mount your dummy camera. Consider factors like visibility, angle, and whether it mimics a real camera’s placement. Ensure the surface can support the weight of the bracket and camera combination.
3. Bracket Attachment: Attach the bracket securely to the chosen surface using the appropriate screws. Follow the manufacturer’s instructions for the best results. Make sure the bracket is level and aligned correctly.
4. Camera Mounting: Once the bracket is in place, carefully attach your dummy camera to it. Align the camera’s lens with the intended view and ensure it’s securely fastened. Double-check all connections for stability.
5. Adjustment and Testing: Make any necessary adjustments to the bracket or camera angle to achieve the desired field of view. Test the camera’s functionality, including motion detection (if applicable), to confirm everything is working as expected.
Maintenance Tips for Optimal Performance
To ensure your dummy security dome camera maintains optimal performance, regular maintenance is key. Start with a thorough cleaning using a soft cloth and mild detergent to remove dust and debris accumulated over time. This simple step can significantly enhance image quality. Next, inspect the camera’s connections, especially the power cable and data link, for any signs of damage or loose fittings. Tighten or replace as necessary to maintain stable performance.
When it comes to dummy camera bracket installation, follow a detailed guide tailored for your model. Proper mounting ensures the camera captures clear, unobstructed views. Regularly verify the bracket’s security, especially in areas prone to weather changes or physical tampering. Lubricating moving parts with approved silicone grease can prevent stiffness and ensure smooth pan-tilt operations. Lastly, keep firmware updated through the manufacturer’s provided channels for enhanced features and bug fixes.
In summary, understanding the basics of dummy security dome cameras and their key features is essential. Choosing the right dummy camera bracket is crucial for optimal performance, as our installation guide has highlighted. Proper maintenance ensures these devices offer effective security solutions without hassle. By following these steps and tips, you can effectively incorporate dummy cameras into your surveillance system, enhancing overall security with minimal effort.