Choosing between Fake Dome and Bullet cameras for a mock surveillance system depends on your needs: Domes blend discreetly for aesthetic appeal in homes/offices, while Bullets offer enhanced visibility and wider fields of view for outdoor or distance monitoring. Before installation, thorough preparation is crucial: assess property, consider obstructions, ensure internet connectivity, gather tools, prioritize safety, and understand component specs. A strategic guide covers camera placement, mounting, connections, testing, and system settings configuration for a comprehensive security solution tailored to your preferences. The "better" choice aligns with specific surveillance requirements and intended environment.
“Elevate your home or business security with our comprehensive guide to installing a mock surveillance system. We demystify the process by comparing two popular options: the versatile Fake Dome and robust Bullet cameras. Learn which suits your needs best, then prepare for installation with our essential tools and safety tips. By following our detailed step-by-step guide, you’ll have a reliable simulation of real surveillance, enhancing peace of mind without breaking the bank.”
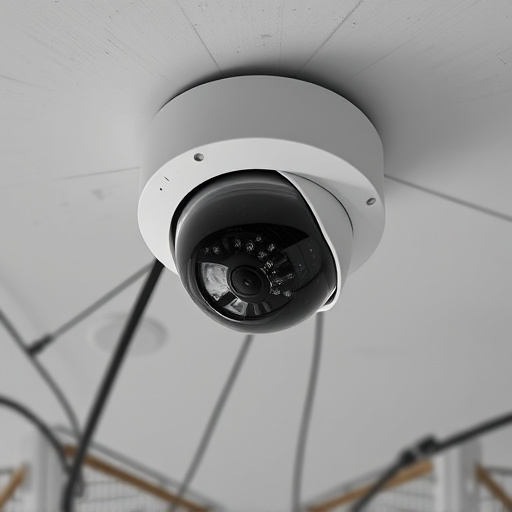
- Understanding Your Options: Fake Dome vs Bullet Cameras
- Planning and Preparation for Installation: Essential Tools and Safety Measures
- Step-by-Step Guide: Installing Your Mock Surveillance System
Understanding Your Options: Fake Dome vs Bullet Cameras
When considering a mock surveillance system, one of the initial decisions involves choosing between fake dome and bullet cameras. Each option offers unique advantages, catering to distinct needs and preferences. Fake dome cameras mimic traditional security cameras with their rounded, dome-like shape, often placed discretely on walls or ceilings. They are ideal for situations where minimal visual disruption is desired, such as in homes or offices aiming to maintain an aesthetic appeal while still benefiting from surveillance.
On the other hand, bullet cameras stand out with their cylindrical design, typically mounted outdoors or in areas requiring a clear line of sight. These cameras offer enhanced visibility and wider fields of view, making them superior for detecting potential threats or activities at a distance. The choice between fake dome and bullet cameras ultimately depends on the specific surveillance requirements, ensuring the selected option aligns with the intended purpose and environment.
Planning and Preparation for Installation: Essential Tools and Safety Measures
Before installing any surveillance system, whether it’s a network of cameras or a single Fake Dome or Bullet Camera Better, thorough planning and preparation are crucial. This involves assessing your property for potential placement spots, considering line-of-sight obstructions, and ensuring adequate internet connectivity. Gather essential tools such as drill bits, wire strippers, network cables, and power supplies to streamline the installation process safely and efficiently.
Safety measures should be at the forefront of your preparation. Turn off power to the area where you’ll be working, use non-conductive materials and tools, and wear protective gear including safety glasses and gloves. Understand the specifications and compatibility of each component to avoid damaging equipment or compromising the integrity of the system. Proper planning and adherence to these safety guidelines will ensure a smooth installation process, providing peace of mind and better protection for your property.
Step-by-Step Guide: Installing Your Mock Surveillance System
Step-by-Step Guide: Installing Your Mock Surveillance System
Begin by selecting the ideal location for your fake dome or bullet camera. Strategically choose spots that offer comprehensive coverage, such as entryways, windows, and common areas. Ensure these locations align with your security needs while maintaining a natural aesthetic. Next, prepare the mounting surfaces. Clean and smoothen walls or ceilings to facilitate secure attachment. Use appropriate brackets or mounts provided with your surveillance system to ensure stability and longevity.
Proceed with carefully installing each camera component. Mount the dome or bullet cameras securely, ensuring they are level and aligned correctly. Connect the cameras to the recording device or NVR (Network Video Recorder) as per manufacturer instructions. Test each camera’s functionality, checking video feed quality and audio clarity. Once satisfied, configure your system settings, including motion detection preferences and notification options. With these steps complete, your mock surveillance system is ready to deter potential intruders while providing peace of mind.
Choosing between fake dome and bullet cameras depends on your needs. Fake dome cameras offer a more realistic appearance, ideal for deterring crime in residential areas, while bullet cameras are robust and versatile, perfect for commercial settings. Regardless of your choice, proper installation is key to an effective mock surveillance system. By following the step-by-step guide and safety measures outlined in this article, you can ensure your system provides clear footage and serves as a powerful deterrent.