Solar-powered dummy camera installation involves strategically placing devices in sunny locations with clear sightlines for optimal performance. Preparation begins by clearing space and aligning cameras towards south (Northern Hemisphere) or north (Southern Hemisphere). Installation guides readers through mounting, hardware assembly, and alignment for efficient solar energy absorption. Post-installation checks ensure functionality, while regular maintenance keeps lenses clean, panels unobstructed, and backup batteries charged for continuous surveillance protection.
“Elevate your home security with the latest in surveillance technology—solar-powered dummy CCTV cameras. This comprehensive guide will walk you through the installation process, from understanding these innovative systems to preparing your outdoor space and performing post-installation checks. Learn how to effectively mount these discreet cameras, ensuring optimal visibility and protection. Discover maintenance tips to keep your solar-powered dummy camera installation in top condition, providing peace of mind in today’s digital era.”
- Understanding Solar-Powered Dummy Camera Systems
- Preparing Your Outdoor Space for Installation
- Step-by-Step Mounting Guide
- Post-Installation Checks and Maintenance Tips
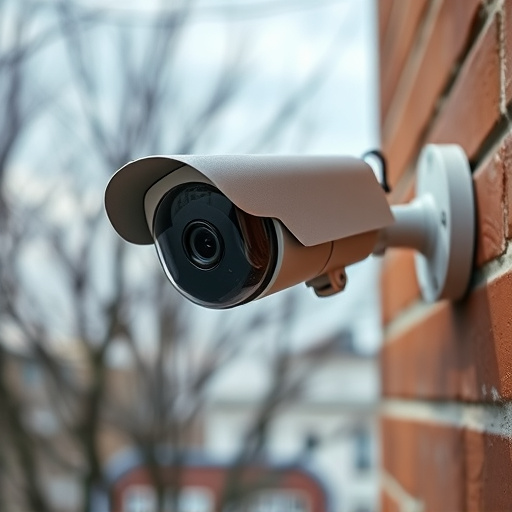
Understanding Solar-Powered Dummy Camera Systems
Solar-powered dummy camera systems are a popular choice for homeowners and business owners looking to enhance security without the complexities of traditional power connections. These innovative devices leverage solar energy, allowing them to operate remotely and autonomously. During installation, understanding how these systems harness sunlight is key to ensuring optimal performance. The panels absorb solar radiation, converting it into electricity through photovoltaic cells. This power is then stored in a rechargeable battery, enabling the camera to function even during periods of low or no sunlight.
When installing a Solar Powered Dummy Camera, positioning plays a crucial role. Place the device in an area that receives ample direct sunlight for most of the day. Clear lines of sight are also essential for effective surveillance. Proper mounting ensures the solar panel faces the sun optimally, while the camera captures clear images or video. This dual functionality makes these systems versatile and efficient, providing both energy independence and enhanced security without the need for elaborate wiring.
Preparing Your Outdoor Space for Installation
Before installing your solar-powered dummy camera, ensure your outdoor space is prepared and ready for the process. Clear a designated area where the camera will be placed, removing any obstacles like plants or debris that might hinder its placement or view. The location should offer adequate sunlight exposure for optimal charging of the solar panel, typically facing south in the Northern Hemisphere or north in the Southern Hemisphere.
Check local regulations and guidelines regarding CCTV installations to ensure compliance with privacy laws. Verify that the chosen spot has stable access to electricity via a nearby outlet if your model requires an additional power source. Proper preparation will not only facilitate a smooth installation but also enhance the security camera’s overall performance.
Step-by-Step Mounting Guide
Solar Powered Dummy Camera Installation: A Step-by-Step Guide
Begin by selecting a suitable location for your solar-powered dummy camera. Ideally, this should be an area with ample sunlight exposure to ensure optimal charging of the integrated solar panel. Ensure the mounting surface is clean and free from obstructions that might block sunlight. Next, gather all necessary tools: the camera, mounting hardware (included with the product), a drill, and any required adapters or connectors.
With your site prepared, attach the mounting bracket securely to the chosen surface using the provided hardware. Align the bracket such that it faces directly towards the sun for maximum energy absorption. Once braced, firmly fix the dummy camera onto the bracket, ensuring it’s snug and stable. Check the instructions for any specific orientation requirements. After installation, test the camera’s functionality, including its solar charging capabilities, to guarantee a seamless surveillance setup.
Post-Installation Checks and Maintenance Tips
After successfully installing your solar-powered dummy camera, conducting thorough post-installation checks is vital. Ensure all components are securely fastened and functioning correctly. Verify that the camera’s power source, typically a solar panel and battery, is properly aligned for optimal sunlight exposure. Check connections to ensure data transmission between the camera and its display or recording device. Regularly test the system to confirm alert notifications and recordings work as expected.
Maintenance tips include keeping the camera’s lenses clean and free from debris for clear visuals. Periodically inspect the solar panel for any damage or obstruction that might hinder sunlight absorption. Depending on your environment, cleaning the panel may be necessary to maintain efficient power generation. Remember to store extra batteries and keep them charged for backup power during extended periods without sunlight.
Installing a solar-powered dummy CCTV camera system is an effective way to enhance outdoor security without the hassle of complicated wiring. By following these comprehensive instructions, from understanding the technology to post-installation care, you can easily mount and maintain your new security solution. This DIY approach allows you to take control of your property’s safety, ensuring peace of mind in today’s digital era. Remember, a well-prepared outdoor space and proper maintenance are key to getting the most out of your solar-powered dummy camera installation.