The Dummy Dome Camera Installation Guide provides a straightforward process for enhancing security with an effective crime deterrent. By mounting the camera on a visible wall or pole, aligning with regulations and privacy, users can benefit from high-resolution video capture, adjustable LED lighting, and real-time monitoring. The guide offers step-by-step instructions for strategic positioning, fine-tuning settings, and regular care to ensure optimal surveillance coverage. This DIY process enables both residential and commercial users to securely set up the camera, deterring intruders with its realistic design and visible presence.
“Uncover the power of enhanced security with our comprehensive guide to the Dummy Dome Camera Installation. This article delves into every aspect of this innovative security system, from understanding its core components—the security camera shell and lights—to providing a detailed step-by-step installation process.
Learn about the benefits, real-world applications, and maintenance tips for these cameras, which offer a cost-effective and aesthetically pleasing alternative to traditional security measures. Get ready to transform your space with our practical Dummy Dome Camera Installation Guide.”
- Understanding Dummy Dome Camera: A Comprehensive Overview
- Components of a Security Camera Shell with Lights
- Step-by-Step Guide to Installing the Dummy Dome Camera
- Benefits and Applications of This Security System
- Tips for Maintaining Your Security Camera Setup
Understanding Dummy Dome Camera: A Comprehensive Overview
A Dummy Dome Camera, often used as a security measure or for deterrence, is a clever device designed to resemble a real security camera. It serves as an effective visual deterrent, providing peace of mind and enhanced safety for homes, businesses, and public spaces. This innovative product offers a straightforward Installation process, making it accessible for anyone looking to bolster their security system without complex setup procedures.
The Dummy Dome Camera Installation Guide typically involves mounting the camera on a visible wall or pole, ensuring its placement aligns with local regulations and privacy considerations. The guide provides step-by-step instructions, from selecting the ideal location to adjusting the camera’s angle for optimal visibility. With a simple twist of the lens, users can simulate real-time monitoring, tricking potential intruders into believing they’re under constant surveillance.
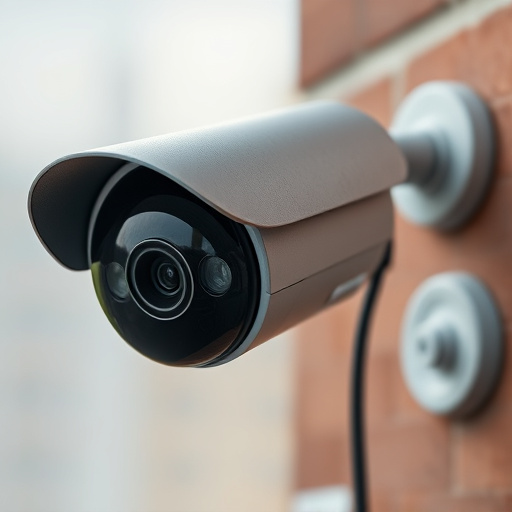
Components of a Security Camera Shell with Lights
A security camera shell with lights, often referred to as a dummy dome camera or installation guide, is a comprehensive system designed to deter crime and monitor environments effectively. The key components include the camera itself, an illuminated housing unit, and various mounting accessories. The camera captures high-resolution footage, while the integrated lighting enhances visibility during low-light conditions, ensuring clear and detailed recordings.
The housing unit typically features LED lights that can be adjusted for brightness and color temperature, providing a realistic appearance to mimic actual camera activity. This design element serves as a powerful deterrent, as potential intruders are less likely to target locations equipped with such sophisticated security measures. Additionally, the mounting accessories ensure proper placement, stability, and discreetness, allowing for strategic positioning to maximize surveillance coverage.
Step-by-Step Guide to Installing the Dummy Dome Camera
Installing a Dummy Dome Security Camera is a straightforward process that can significantly enhance your home or business’s security and deter potential intruders. Here’s a step-by-step guide to help you get started. First, gather all necessary tools, including your new dummy dome camera, mounting hardware (usually included with the package), screws, a drill, and a level. Choose an ideal location for your camera—a spot high enough to offer a clear view of the area you wish to monitor. Ensure it’s mounted securely on a solid surface, like a wall or ceiling. Next, attach the camera’s base to the mounting hardware according to the instructions provided. Align the camera carefully, ensuring its field of vision covers the desired area. Once positioned correctly, secure the camera firmly in place with the screws. Test the camera’s functionality, confirming both audio and video are working optimally. Adjust any settings for optimal clarity and illumination using the accompanying software or mobile app.
Benefits and Applications of This Security System
The security camera shell with lights offers a multifaceted approach to home and business protection, making it a popular choice for those seeking comprehensive surveillance. One of its key advantages is the deterrence factor; the visible presence of cameras and illuminated areas can significantly reduce the likelihood of crime, acting as a powerful deterrent for potential intruders. This system’s versatility is another significant benefit. It can be discretely installed as a Dummy Dome Camera, blending seamlessly into various environments without drawing attention to itself. The installation process, detailed in a standard Dummy Dome Camera Installation Guide, allows for easy setup, ensuring that even those without technical expertise can securely install the device.
Moreover, these security systems provide peace of mind by offering real-time monitoring capabilities. With motion detection and LED lighting, it actively alerts users to any unusual activity, enabling prompt responses. The applications are vast, ranging from residential properties seeking enhanced safety to commercial spaces requiring around-the-clock surveillance, ensuring that businesses and homes alike can benefit from this advanced technology.
Tips for Maintaining Your Security Camera Setup
Maintaining a robust security camera system starts with proper installation and extends to regular care. For those using a dummy dome camera, following an installation guide tailored for your model is paramount. This ensures optimal positioning for both visual coverage and light distribution. Mounting at eye-level and ensuring the camera has a clear view of the target area are basic yet critical steps.
Regular cleaning of the camera lens and surrounding areas is essential to prevent dust buildup, which can obscure footage quality. Additionally, checking power connections regularly to avoid disruptions is vital. Testing the camera’s functionality periodically allows you to verify that the system remains vigilant, ready to capture any unusual activity as per your Dummy Dome Camera Installation Guide.
The Dummy Dome Camera, with its versatile design and advanced features, offers a comprehensive security solution. By following our detailed installation guide and maintenance tips, you can easily integrate this system into your property’s security framework. The benefits of the Dummy Dome Camera extend beyond mere aesthetics; it provides enhanced visibility, dissuades potential intruders, and gives homeowners peace of mind. With its robust components and bright lighting, this security camera setup is a game-changer for anyone seeking to protect their space.