The Dummy Dome Camera Installation Guide offers a straightforward process for enhancing security with minimal setup. Prepare your space, follow mounting instructions, and connect cables as outlined in the guide. Optimize performance by testing motion detection, adjusting sensitivity, and regularly reviewing settings for an effective, game-changing security solution.
Are you looking to enhance your home or business security with a dummy dome camera? This comprehensive installation guide is your go-to resource. From understanding the functionality of these clever devices to optimizing their performance, we’ve got you covered. Learn how to prepare your space, mount the camera step-by-step, wire it properly, and test its capabilities. No more guessing – become a security expert with our Dummy Dome Camera Installation Guide.
- Understanding Dummy Dome Camera Functionality
- Preparing Your Space for Installation
- Step-by-Step Mounting Instructions
- Wiring and Connection Setup
- Testing and Optimizing Performance
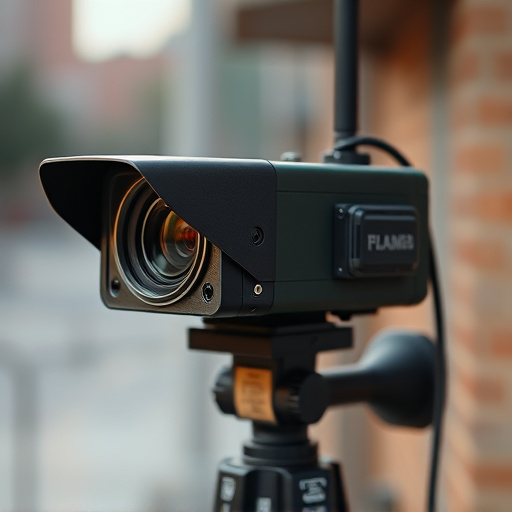
Understanding Dummy Dome Camera Functionality
A Dummy Dome Camera, often used in security and surveillance systems, is a crucial component that enhances visual protection. Its primary function is to mimic real camera presence, deterring potential intruders with the illusion of constant observation. This innovative device is particularly useful for businesses and homes seeking an extra layer of security without the need for extensive wiring or complex setup.
The installation process of a Dummy Dome Camera Installation Guide typically involves mounting the camera on a suitable surface, ensuring it has a clear view of the targeted area. The red blinking light serves as a distinctive feature, indicating both the camera’s operational status and its deterrence role. By following a step-by-step guide tailored for your specific model, you can efficiently install this device, contributing to a safer environment.
Preparing Your Space for Installation
Before installing your dummy dome camera, it’s crucial to prepare your space for a seamless setup. Start by ensuring the area where you’ll place the camera is secure and stable. Choose a location with optimal visibility and avoid areas that are easily obstructed by furniture or other objects. Clear any clutter and ensure there’s enough room for the camera to be mounted securely.
Next, verify that your power outlets are within reach and suitable for direct connection to the camera’s power cable. Ensure proper grounding to prevent electrical hazards. Check if you have a stable internet connection to facilitate remote access and monitoring. Following these steps will make the installation process smoother and ensure your dummy dome camera functions optimally once set up.
Step-by-Step Mounting Instructions
Dummy Dome Camera Installation Guide:
1. Preparation: Before mounting your dummy dome camera, ensure all necessary components—including the camera, base, and fixation hardware—are assembled and within reach. Gather tools like a screwdriver, level, and any required accessories as per your setup. Choose a suitable location, ensuring it aligns with your surveillance needs, offering clear visibility without obstructed views.
2. Mounting Process: Start by mounting the camera base securely on the desired surface using the provided hardware. Ensure it’s sturdy and level. Next, carefully attach the dummy dome to the base, aligning the camera’s lens for optimal view. Secure all components with tight fasteners, double-checking their firmness. Connect the power cable, ensuring a stable connection to a nearby power source. Adjust any settings on your surveillance system to incorporate the new dummy camera, and you’re ready to monitor and secure your space effectively.
Wiring and Connection Setup
The wiring and connection setup for a dummy dome camera installation is a crucial step in ensuring its functionality and proper placement. Start by gathering all necessary components, including the camera, mounting hardware, and cables. Identify the power source and route the appropriate cable to the camera’s power connector, securing it tightly to maintain stability. Next, connect the video output cable from the camera to the monitoring system or recording device. Ensure each connection is secure and well-soldered for reliable transmission.
Follow the manufacturer’s guidelines to integrate any additional sensors or alarm systems, if applicable. Position the dummy camera in the desired location, securing it firmly with the provided mounting equipment. Proper wiring and connections are key to a seamless installation process, allowing the camera to blend into its surroundings while maintaining optimal performance for observation or security purposes.
Testing and Optimizing Performance
When setting up a dummy dome camera installation, testing and optimizing performance is crucial for achieving the best results. Start by confirming that the camera’s LED indicator light blinks in sync with its intended motion detection settings. Adjust sensitivity levels to minimize false alarms while ensuring the camera effectively captures movement within its field of view.
Use a dummy test object or even a friend’s movement to validate the camera’s responsiveness and accuracy. Once satisfied, optimize placement for optimal visibility and coverage, considering factors like lighting, angle, and potential obstructions. Regularly review and adjust settings through the surveillance system’s software to maintain peak performance as environmental conditions change.
The installation of a dummy dome camera, as outlined in this Dummy Dome Camera Installation Guide, offers a straightforward solution for enhancing security and deterring crime. By understanding the functionality, preparing your space, following precise mounting instructions, and optimizing performance, you can effectively transform any area into a safer, more secure environment. This guide ensures a seamless process, empowering you to take control of your safety with confidence.