Choose a location with clear visibility and direct sunlight access for a Solar Powered Fake Camera Setup. Mount the solar panel optimally, prepare hardware for chosen surface, and align the fake CCTV camera. Ensure concrete pole placement for stability, test functionality, and adjust panel orientation for optimal performance.
Looking to enhance your home or business security with a unique approach? Discover the power of a solar-powered fake CCTV setup. This comprehensive guide will walk you through the steps, from selecting the perfect location for your solar camera to assembling the mounting hardware and installing the realistic-looking device. Learn how to position and secure the pole, test your system, and adjust for optimal performance. Elevate your security with this innovative and environmentally friendly solution.
- Choose the Ideal Location for Your Solar Camera
- Assemble the Solar Panel and Mounting Hardware
- Install the Fake CCTV Camera and Wiring
- Position and Secure the Mounting Pole
- Test and Adjust Your Solar Powered Setup
Choose the Ideal Location for Your Solar Camera
When setting up a solar-powered fake CCTV camera, selecting the perfect location is key. Aim for an area that offers clear visibility and ample sunlight exposure during the day—the more sun, the better for optimal power generation. Look for spots where potential intruders might pass by, ensuring the camera captures their approach effectively.
Consider factors like proximity to entry points, landscaping, and any obstructions that could hinder its view. A well-placed solar fake camera can provide a powerful deterrent to would-be thieves or vandals, so choose a strategic location that leverages both natural light and strategic vantage points for maximum security benefits.
Assemble the Solar Panel and Mounting Hardware
To create a reliable and discreet Solar Powered Fake Camera Setup, start by assembling the solar panel and mounting hardware. Begin by attaching the solar panel to its stand or bracket using the included fasteners. Ensure the panel is securely fastened and positioned to receive optimal sunlight exposure. Next, prepare the mounting hardware, which typically includes brackets, screws, and anchors suitable for your chosen surface – whether it’s a wall, fence, or other structure. Ensure your chosen location offers adequate sunlight access for efficient power generation.
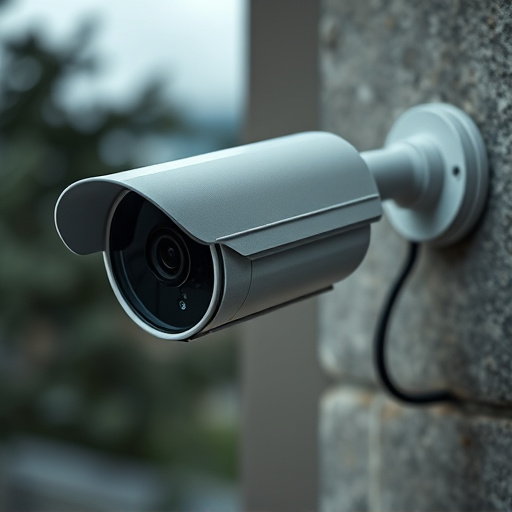
Install the Fake CCTV Camera and Wiring
To begin your Solar Powered Fake Camera Setup, carefully install the fake CCTV camera onto its mounting bracket. Ensure it’s securely attached and aligned with your desired view. Next, run the provided wiring from the camera to a suitable power source. This could be a nearby electrical outlet or, for outdoor areas, tap into your solar panel system if equipped.
Make sure all connections are tight and secure to prevent any disruptions in surveillance. The wiring should also connect to a hidden control box that allows you to monitor and operate the camera remotely, completing your realistic Solar Powered Fake Camera Setup.
Position and Secure the Mounting Pole
When setting up a solar-powered fake camera setup, proper positioning and securing of the mounting pole are paramount to ensure optimal visibility and stability. The pole should be placed in an area that offers a clear line of sight, away from obstructions like trees or buildings, to maximize its effectiveness as a deterrent. Ensure it’s firmly embedded in stable ground, considering factors like soil composition and depth, to withstand various weather conditions.
Use the provided accessories to fasten the pole securely. This might involve digging a hole for the base, filling it with concrete for added rigidity, and then attaching the mounting bracket using screws or other specified fasteners. The pole should stand tall and steady, allowing the fake camera to be positioned at an appropriate height, typically eye-level or slightly elevated, for optimal surveillance and deterrence value.
Test and Adjust Your Solar Powered Setup
After mounting your solar-powered fake camera setup, it’s crucial to test its functionality and adjust for optimal performance. Start by ensuring that the camera is properly aligned with any intended targets or areas you wish to monitor. Verify that the solar panel is positioned to receive maximum sunlight exposure during the day, as this will directly impact the energy generation and subsequent operation of your device.
Use a test light source or a bright flashlight to simulate different lighting conditions throughout the day. Observe how the camera responds in low-light scenarios and ensure its night vision capabilities meet your expectations. If necessary, tweak the panel’s orientation or angle to maximize sunlight absorption. Regularly checking and adjusting these settings will ensure your Solar Powered Fake Camera Setup remains effective and efficient over time.
Installing a solar-powered fake CCTV camera setup is an efficient and sustainable way to enhance home security. By carefully choosing a location, assembling the hardware, and securing the mounting pole, you can create a realistic surveillance system that leverages renewable energy. Regular testing and adjustments ensure optimal performance, providing peace of mind and environmental friendliness.