Mounting dummy cameras under roof eaves offers unobstructed views for enhanced security and weather protection. Precise mounting with non-penetrating brackets is crucial. Gather essential components, research local permits, and ensure optimal bracket positioning. Secure brackets to eave structure using outdoor screws and anchors. Attach cameras following manufacturer instructions for stability. Test wiring before installing real cameras for seamless integration.
“Enhance your home or business security with our guide on mounting dummy cameras under eaves. This comprehensive tutorial walks you through crucial steps, from choosing the ideal location for optimal visibility to connecting and testing your system. Learn how to measure and mark the perfect spot, prepare essential mounting hardware, install brackets securely, and set up your dummy CCTV system efficiently. Maximize protection with these clear instructions.”
- Choose Location: Select Eave Space for Optimal Visibility
- Measure and Mark: Determine Camera Position Accurately
- Prepare Mounting Hardware: Gather Necessary Tools and Parts
- Install Brackets: Securely Fasten to Eave Structure
- Connect Cameras: Wire and Test Dummy CCTV System
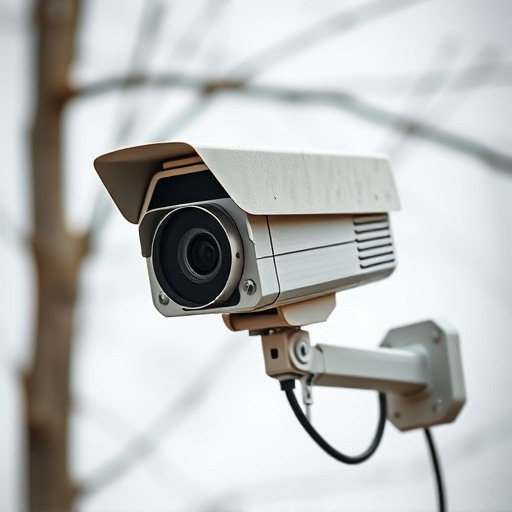
Choose Location: Select Eave Space for Optimal Visibility
When mounting exterior fake CCTV cameras, selecting the right location is paramount. The eave space under your roof overhang offers an ideal spot for several reasons. Firstly, it provides a strategic vantage point with minimal obstruction, ensuring maximum visibility for your surveillance system. By installing dummy cameras under eaves, you create the appearance of comprehensive coverage, deterring potential intruders.
This location also offers protection from harsh weather conditions, prolonging the lifespan of your fake CCTV equipment. The overhang acts as a natural shield, shielding the cameras from direct sunlight and heavy rainfall, which are common challenges when installing exterior surveillance devices.
Measure and Mark: Determine Camera Position Accurately
When setting up exterior CCTV, accurately determining the camera’s position is key. Before mounting your device, especially in tricky spots like under eaves, use a measuring tape to gauge the ideal distance from your property’s entrance or target area. This measurement will guide where you mark the mounting point on the wall or structure. Marking the spot precisely ensures the camera lines up perfectly with your desired field of view.
For mounting dummy cameras under eaves, consider using non-penetrating mounts to avoid damaging the roof structure. Measure from the base of the eave to determine the vertical height, then mark this location. This meticulous approach guarantees a professional installation, allowing for optimal camera positioning and clear visuals, enhancing your home or business security.
Prepare Mounting Hardware: Gather Necessary Tools and Parts
To begin preparing your exterior CCTV mounting hardware, start by gathering all the necessary tools and parts. This typically includes a set of mounting brackets specific to your camera model, screws suitable for your locale’s weather conditions (often stainless steel or PVC-coated), and lockable nuts or bolts to secure the camera firmly. For mounting dummy cameras under eaves, consider additional components such as rain shields to protect the camera from direct exposure to the elements and a flexible cable to ensure optimal viewing angle adjustments.
Don’t forget to check if your mounting location requires any local permits or follows specific regulations, especially when mounting dummy cameras under eaves of residential properties. Ensure you have the proper clearances and approvals before proceeding with installation. The right tools and preparation will significantly simplify the mounting process and contribute to a robust, long-lasting security setup.
Install Brackets: Securely Fasten to Eave Structure
To begin mounting your exterior dummy cameras under eaves, start by installing brackets that securely fasten to the eave structure. This step is crucial for ensuring your CCTV system is sturdy and stable, even in varying weather conditions. Position the brackets at a suitable height, typically halfway or closer to the middle of the eave, allowing optimal coverage without obstructing natural light or ventilation. Use high-quality screws and anchors designed for exterior use to bolt the brackets into the wood or metal eave, providing a strong foundation.
Double-check that the brackets are level before moving on to the next step. Proper alignment is key to preventing future issues with your camera positioning. Once secured, attach your dummy cameras to the brackets using the provided hardware. This process should be straightforward, following the manufacturer’s instructions for the specific model you’re installing. Ensure all hardware is tightened securely, further reinforcing the overall stability of your mounting system.
Connect Cameras: Wire and Test Dummy CCTV System
To begin setting up your exterior CCTV system, start by connecting and testing a dummy camera. This process involves running cables from each camera to a central control unit, ensuring a secure and stable connection for optimal performance. For mounting dummy cameras under eaves, carefully route the wires along the roof’s edge, securing them with appropriate brackets or clips.
This initial step allows you to verify that your CCTV system is functioning correctly before installing real cameras. Testing the dummy setup ensures that power is flowing smoothly to each device and that video signals are transmitted clearly. Once satisfied with the performance of the dummy camera, you can proceed to install authentic CCTV cameras, leveraging the established wiring and mounting configuration for a seamless integration under your eaves.
Mounting dummy cameras under eaves is a strategic approach to enhance home or business security. By strategically choosing a location, measuring precisely, and installing robust brackets, you can create an effective surveillance network. Remember, the key lies in optimal visibility—selecting the right space under your eaves ensures comprehensive coverage without compromising aesthetics. With these steps and some basic tools, you’re well on your way to a secure future, keeping an eye on your property with confidence.