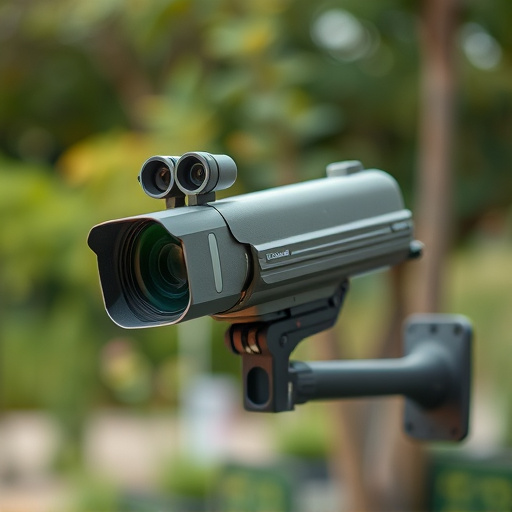
For effective dummy dome camera installation, strategically place cameras in high-risk areas and entry points, using a floor map for efficiency. Ensure realistic visualization, secure mounting, and proper wiring as outlined in the Dummy Dome Camera Installation Guide. Test and calibrate for clear footage, audio, and accurate field of view coverage without blind spots.
“Enhance your home or business security with our comprehensive Dummy Dome Camera Installation Guide. Learn how to create an effective surveillance system using realistic yet non-functional cameras. This step-by-step process covers everything from planning your layout and selecting strategic installation locations to mounting, wiring, and testing. Master the art of deception and protect your assets with our expert tips on achieving a convincing mock surveillance setup.”
- Planning Your Dummy Dome Camera Layout
- Selecting the Ideal Installation Locations
- Mounting and Securing Dummy Cameras
- Wiring and Connecting to Power Sources
- Testing and Calibrating the System
Planning Your Dummy Dome Camera Layout
When planning your dummy dome camera layout for a mock surveillance system installation guide, consider the areas that require monitoring and the potential entry points. Identify windows, doors, and other vulnerable spots where thieves or intruders might attempt to gain access. Arrange your Dummy Dome Cameras in strategic locations, ensuring comprehensive coverage of these high-risk areas. Think about the field of view each camera will provide; you’ll want to cover all angles without any blind spots.
Visualize the layout on a floor plan if possible. This step is crucial for efficient use of your dummy cameras. Remember that placement should not only be functional but also realistic, mimicking actual security camera setups. By carefully planning and strategically placing your Dummy Dome Cameras, you’ll create an effective mock surveillance system that serves as both a deterrent and a comprehensive security measure.
Selecting the Ideal Installation Locations
When setting up a mock surveillance system, selecting the right installation locations for your dummy dome cameras is paramount to achieving effective deception. These cameras should be strategically placed in areas that mimic high-security zones, such as entry points, perimeters, and critical assets or valuables within a building or facility. Consider well-trafficked paths, obvious observation points, and places where genuine security measures would be visible—all while ensuring the dummy cameras look convincing.
A Dummy Dome Camera Installation Guide should outline best practices for choosing locations that blend seamlessly with actual surveillance setup. This means mounting cameras at eye level or slightly elevated angles, positioning them to capture clear views without obstructing natural lines of sight, and ensuring they’re securely attached to sturdy surfaces like walls or ceilings. By carefully selecting these installation points, you create an authentic illusion of comprehensive monitoring, deterring potential intruders or vandals from targeting your premises.
Mounting and Securing Dummy Cameras
Mounting and securing dummy cameras is a crucial step in setting up your mock surveillance system. Begin by selecting suitable locations for each camera, ensuring strategic placement to mimic real-world surveillance. Use sturdy brackets or mounts designed specifically for dummy dome cameras, allowing for secure attachment to walls, ceilings, or structures. Proper mounting ensures the cameras remain stable and undisturbed during potential intrusions or environmental changes.
When securing the cameras, consider using industrial-strength screws and anchors to prevent easy dislodging. Align the camera’s view angle according to your desired field of vision, capturing key areas without obstruction. Remember, the goal is to create a realistic appearance while maintaining the system’s integrity for its intended purpose.
Wiring and Connecting to Power Sources
During the dummy dome camera installation, wiring is a critical step that requires meticulous planning and precision. The guide emphasizes the importance of understanding your power sources before beginning. Identify the location where each camera will be placed and assess the distance from the nearest power outlet. This ensures the appropriate gauge of cable is chosen to meet the electrical demands of the device without compromising signal quality.
Connect each component carefully, following a logical sequence. Start by attaching the camera’s power cable to the unit itself, then route it towards the desired power source. Use high-quality connectors and cables to maintain the integrity of the circuit. Double-check your work to guarantee every connection is secure, aligning with the instructions provided in the Dummy Dome Camera Installation Guide for a seamless setup.
Testing and Calibrating the System
After successfully installing your dummy dome camera, it’s crucial to test and calibrate the system for optimal performance. Start by ensuring all connections are secure and the camera is powered on. Use the provided testing tools or a compatible mobile app to verify that the camera captures clear footage and audio within its specified range. Adjust the settings like resolution, infrared intensity, and motion detection sensitivity as per your environment’s needs.
Calibration involves aligning the camera’s field of view with the target area you wish to monitor. Refer to the dummy dome camera installation guide for detailed instructions on how to adjust the camera’s position and angle to cover every corner of the space. This step is essential, especially if you have unique architectural features or unusual layouts, ensuring comprehensive surveillance without blind spots.
This comprehensive dummy dome camera installation guide has equipped you with the knowledge to transform any space into a secure, monitored area. From meticulously planning your layout to the final testing and calibration, each step ensures a professional setup that discourages potential intruders. With these straightforward instructions, you can now confidently protect your property, knowing your chosen locations are effectively covered by realistic mock surveillance systems.