Solar-powered dummy camera installations offer an eco-friendly and energy-efficient security solution. They provide flexibility in placement, reduce environmental impact by harnessing sunlight, save on electricity bills, and integrate seamlessly into environments. Key to successful installation is choosing a sunny location with clear lines of sight for optimal surveillance. Setup involves unboxing, cleaning the solar panel, calibrating settings, mounting the camera, installing the solar panel, connecting, and testing functionality during day and night.
“Enhance your home or business security with a Solar Powered Dummy Camera – a smart, sustainable choice. This guide explores the benefits of solar energy for dummy cameras, helping you make an informed decision. We’ll walk you through the process of installation, from choosing the ideal location to setting up your new camera efficiently. Discover how solar-powered options provide reliable surveillance without breaking the bank. Get ready to secure your space with a green and cost-effective solution.”
- Understanding Solar Powered Dummy Camera Benefits
- Choosing the Right Location for Installation
- Step-by-Step Guide to Setting Up Your Solar Dummy Camera
Understanding Solar Powered Dummy Camera Benefits
Solar-powered dummy camera installations offer a unique and sustainable approach to home security, appealing to eco-conscious homeowners and those looking for an energy-efficient solution. One of the key advantages is the elimination of electrical cords and wires, providing greater flexibility in placement. These cameras can be strategically positioned without worrying about access to power outlets. This feature makes them ideal for areas like gardens, driveways, or even outdoor entertainment spaces where traditional wiring might be impractical.
Additionally, solar technology ensures a reduced environmental impact compared to conventional camera systems. The self-sufficient nature of these devices means they operate independently, drawing energy from the sun during the day and storing it for nighttime use. This sustainable approach not only saves on electricity bills but also contributes to a greener lifestyle. With regular exposure to sunlight, homeowners can enjoy consistent power supply for their dummy security cameras without worrying about frequent battery replacements or the hassle of wired connections.
Choosing the Right Location for Installation
When considering a solar-powered dummy camera installation, choosing the right location is paramount. These security cameras are designed to blend in seamlessly with their surroundings, making strategic placement crucial. Opt for an area that receives ample sunlight exposure during peak hours, as this ensures efficient energy generation for the camera’s operation and any connected sensors. Look for locations where potential threats or areas of interest are visible, such as entry points, parking lots, or common gathering spaces.
Keep in mind that solar-powered cameras offer a sustainable and cost-effective solution, especially in remote or hard-to-reach places where traditional power sources might be impractical. By harnessing the power of the sun, these devices provide a reliable and continuous surveillance system without the need for frequent battery replacements or complex wiring. This makes them ideal for both residential and commercial security applications, enhancing overall safety and peace of mind.
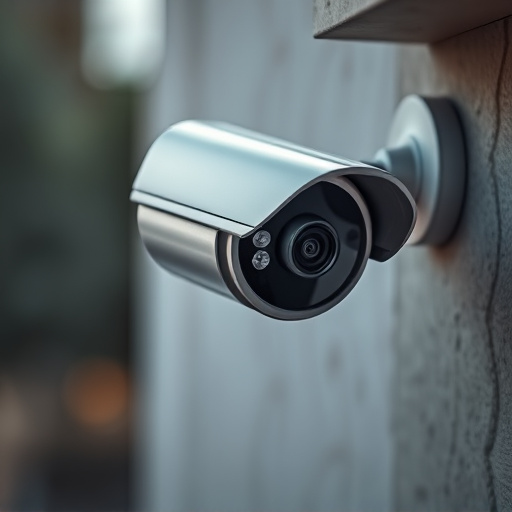
Step-by-Step Guide to Setting Up Your Solar Dummy Camera
Setting up a solar-powered dummy security camera is an eco-friendly and efficient way to enhance your home or business’s security. Here’s a step-by-step guide to help you get started:
1. Choose the Right Location: Select a spot that receives ample sunlight, typically around 6-8 hours of direct sunlight daily. Ensure it’s visible enough for clear surveillance but also strategically placed to avoid shadows from nearby structures or trees. Clear lines of sight are essential for effective monitoring.
2. Unbox and Prepare: Once you’ve determined the ideal location, unpack your solar dummy camera. Check all components, including the solar panel, battery, camera body, and mounting hardware. Clean the solar panel to ensure optimal sunlight absorption. Calibrate the camera’s settings according to your preferences, focusing on image quality and motion detection sensitivity.
3. Mount the Camera: Use the provided brackets or mounts to securely attach the camera to a suitable surface. This could be a wall, fence, or pole. Ensure the mounting is sturdy and stable, as this prevents theft or damage. Position the solar panel towards the sun, allowing it to capture maximum light exposure throughout the day.
4. Install the Solar Panel: Attach the solar panel to the camera’s base or a nearby surface that can accommodate it. Ensure proper alignment with the sun’s path for optimal charging. Some panels may have adjustable angles and mounts to customize their position.
5. Connect and Test: Link the camera to its power source, often a rechargeable battery. Test the camera’s functionality by turning it on and checking its image feed. Verify motion detection by simulating movement in the surveillance area. Ensure the camera captures clear footage during both day and night operations.
A solar-powered dummy camera offers a hassle-free and eco-friendly surveillance solution. By choosing the optimal location for installation, as outlined in this guide, you can maximize its effectiveness. Following the step-by-step setup process ensures your solar dummy camera is up and running smoothly, providing both peace of mind and enhanced security without the need for complex wiring or constant power sources. Embrace the benefits of Solar Powered Dummy Camera Installation for a smarter, more sustainable home security system.