Solar-powered dummy cameras offer homeowners a sustainable and effective security solution. Strategically placing them in outdoor areas covers entry points, acts as deterrents, and enhances overall security without compromising aesthetics. Installation requires specific tools, including a solar panel, weatherproof housing, and mounting hardware, for seamless assembly and optimal performance. Regular testing, maintenance, and positioning ensure the camera's functionality and effectiveness in various weather conditions.
“Uncover the power of solar-powered dummy cameras with our comprehensive installation guide, designed to transform your space into a secure zone. Explore the benefits and diverse applications of these innovative devices in ‘Understanding Solar-Powered Dummy Cameras.’ Then, navigate ‘Planning Your Mock Surveillance System Installation’ for strategic insights. Learn about essential tools in ‘Essential Tools and Equipment,’ follow a step-by-step process in ‘Step-by-Step Guide,’ and ensure longevity through ‘Testing and Maintaining.’ Enhance your security with this solar camera installation expertise.”
- Understanding Solar-Powered Dummy Cameras: Benefits and Applications
- Planning Your Mock Surveillance System Installation
- Essential Tools and Equipment for the Job
- Step-by-Step Guide to Installing Solar-Powered Dummy Cameras
- Testing and Maintaining Your Solar Mock Surveillance System
Understanding Solar-Powered Dummy Cameras: Benefits and Applications
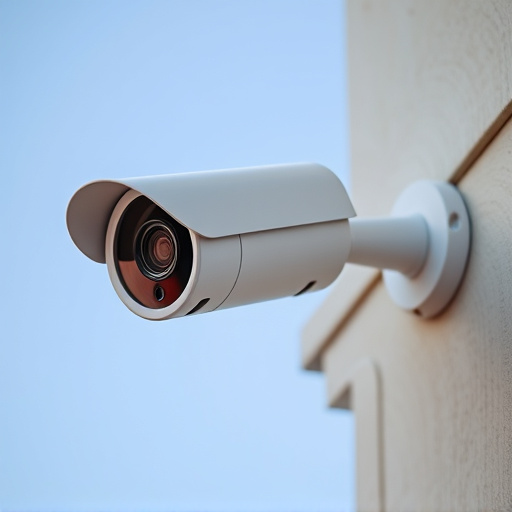
Solar-powered dummy cameras offer a unique and eco-friendly approach to home security, making them an attractive option for homeowners seeking both functionality and sustainability. These cameras are designed to mimic real surveillance equipment but with the added advantage of renewable energy. One of the key benefits is their self-sufficiency; being solar-powered means they can be strategically placed outdoors without the need for constant power connections, ensuring a hassle-free installation process. This feature makes them ideal for areas like gardens, driveways, or patios, providing a visible deterrent to potential intruders.
The applications of solar-powered dummy cameras are diverse. They serve as an effective visual aid in deterring theft and vandalism, giving the impression of constant surveillance. These cameras can also be valuable tools for monitoring access points, ensuring that only authorized individuals enter specific areas. With their discreet design and energy efficiency, they blend seamlessly into various environments, allowing homeowners to enhance security without compromising aesthetics.
Planning Your Mock Surveillance System Installation
When planning your mock surveillance system installation, particularly focusing on solar-powered dummy camera setup, begin by thoroughly assessing the area to be monitored. Identify potential locations for strategic placement of dummy cameras, considering factors like line-of-sight obstructions and lighting conditions. Solar power is an eco-friendly option that ensures consistent energy supply without requiring external wiring, making it ideal for remote or hard-to-reach areas.
Map out a layout that covers all essential entry points, assets, or areas of interest. Ensure the placement aligns with your security objectives while factoring in factors like camera field of view and battery backup capacity to guarantee optimal performance under varying weather conditions. This thoughtful planning will result in an effective mock surveillance system installation that effectively discourages potential intruders without breaking the bank.
Essential Tools and Equipment for the Job
When setting up a solar-powered dummy camera, also known as a mock surveillance system, there are several essential tools and equipment required to ensure a seamless installation process. This includes a reliable solar panel, designed to harness energy from sunlight for power; a durable and weatherproof dummy camera housing; and robust mounting hardware suitable for outdoor conditions. A crucial accessory is an adjustable tripod or bracket, enabling the camera to be positioned at the optimal angle for maximum visibility.
Additionally, you’ll need basic tools like screwdrivers (for assembly and adjustments), wire strippers (to prepare cables), and a multimeter (to test power connections). It’s also beneficial to have a set of high-quality cable ties for securing wires and a clear, waterproof bag to store any spare parts. These tools will enable you to efficiently install the solar-powered dummy camera, creating an effective, yet invisible, security measure for your property.
Step-by-Step Guide to Installing Solar-Powered Dummy Cameras
Installing solar-powered dummy cameras is a straightforward process that offers a cost-effective and eco-friendly security solution. Here’s a step-by-step guide to help you through the installation process, ensuring your property is well-protected. Begin by selecting the ideal location for your solar-powered camera, considering areas with ample sunlight exposure for optimal energy generation. Clear any obstructions that might shade the panel and ensure it faces directly towards the sun.
Next, extract the camera from its packaging, including all necessary components such as the base, solar panel, and power cable. Carefully align the camera’s mounting bracket to match your chosen installation spot, securing it firmly with screws or adhesives provided in the kit. Mount the solar panel onto the bracket, ensuring it’s angled correctly for maximum sunlight absorption. Once secure, attach the power cable from the panel to the camera, completing the electrical connection.
Testing and Maintaining Your Solar Mock Surveillance System
After successfully installing your solar-powered dummy camera, it’s crucial to ensure optimal performance through regular testing and maintenance. Begin by checking the system’s functionality, including power supply and camera movement (if applicable). Ensure the solar panels are positioned optimally for maximum sunlight exposure, as this is key to keeping the system charged.
Regular cleaning of the cameras and panels is essential to maintain efficiency. Keep an eye out for any debris or dust buildup that could obstruct light intake. Additionally, inspect connections for loose or damaged wires, addressing these issues promptly. Remember, a well-maintained solar-powered dummy camera installation will provide enhanced security while seamlessly integrating with your surroundings.
Installing a solar-powered dummy camera system is an effective, eco-friendly way to enhance security while offering a range of practical applications. By following this comprehensive guide, you can successfully navigate the installation process, from planning to testing and maintenance. Embracing renewable energy in your surveillance setup not only provides peace of mind but also contributes to a greener future. With the right tools and a strategic approach, you can ensure your solar-powered dummy cameras are effectively deployed, offering both visual deterrence and valuable insights for better security management.