TL;DR:
Mock Camera Placement for Deterrence (MCPD) is a security strategy using realistic camera simulacrum to deter intruders and enhance surveillance. For night photography, MCPD combined with glint detection minimizes disruptive reflections from wet surfaces or stars. This involves placing dummy cameras, calibrating actual cameras with day reference images, activating a glint detection algorithm, adjusting parameters based on environment, and monitoring detected glints for suspicious activity.
In the realm of night photography, capturing serene landscapes and urban scenes with precision requires a keen understanding of glint detection. This article delves into an innovative method leveraging Mock Camera Placement for Deterrence to mitigate reflective glare, enhancing overall image quality. We explore the science behind glint detection in low-light conditions and present a practical, step-by-step guide for photographers aiming to master this technique. By the end, you’ll be equipped to navigate the challenges of night photography with newfound confidence.
- Understanding Glint Detection in Night Photography
- The Role of Mock Camera Placement in Deterrence
- Implementing the Technique: A Step-by-Step Guide
Understanding Glint Detection in Night Photography
Glint detection is a crucial technique in night photography, allowing photographers to capture sharp and detailed images under low-light conditions. In the dark, small reflections from surfaces like wet roads, windows, or even stars can disrupt the overall image quality. These reflections, known as glints, appear as bright spots or streaks that can obscure important elements within the frame. Understanding where these glints originate is key to effective mitigation.
One method to enhance glint detection is by employing mock camera placement for deterrence. This technique involves strategically placing fake cameras or reflective surfaces in areas where glints are commonly observed. By simulating the presence of a camera, real cameras can be positioned differently to avoid direct reflection from these sources. Such an approach not only improves image clarity but also encourages photographers to consider creative camera angles and compositions, enhancing overall night photography experiences.
The Role of Mock Camera Placement in Deterrence
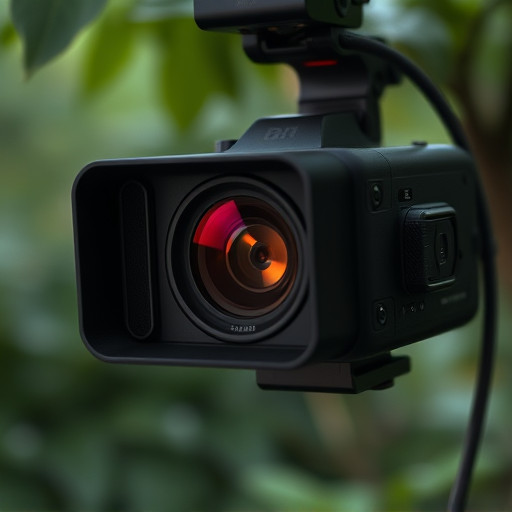
In the realm of night-time security, Mock Camera Placement for Deterrence (MCPD) plays a pivotal role in enhancing surveillance effectiveness. Strategically positioning realistic camera simulacrum can significantly deter potential intruders. These mock lenses, meticulously designed to mimic genuine camera setups, serve as powerful visual cues, suggesting the presence of active surveillance. By deploying MCPD, criminals are likely to pause and consider their actions, potentially choosing alternative, less risky routes or opting to avoid the area altogether.
The effectiveness of MCPD lies in its ability to create an illusion of omnipresent observation. When installed in strategic locations, these mock cameras disrupt criminal activities by conveying a strong message: any attempt at unauthorized entry or mischievous behavior will be swiftly detected and documented. This psychological impact can act as a powerful deterrent, fostering a sense of awareness and respect for security measures among individuals with malicious intent.
Implementing the Technique: A Step-by-Step Guide
Implementing the glint detection method involves a strategic approach to enhancing night-time imaging, especially in security applications. Here’s a step-by-step guide to get you started:
1. Mock Camera Placement: Position dummy cameras strategically across the area of interest. This act serves as a psychological deterrent, making potential intruders less likely to target areas with apparent surveillance. Ensure these mock cameras are realistic replicas to maximise effectiveness.
2. Sensor Calibration: Calibrate your actual cameras using high-quality reference images taken during the day. This step is crucial for accurate glint detection because it enables the software to recognise and differentiate between genuine light reflections and false positives caused by environmental factors like water droplets or dust particles.
3. Glint Detection Algorithm Activation: Use a specialised algorithm designed for glint detection, capable of analysing video feeds in real-time. This algorithm identifies pixels that exhibit sudden changes in brightness, which are indicative of glints.
4. Adjust Parameters for Optimal Performance: Fine-tune the algorithm’s settings based on the environment and lighting conditions. Adjust thresholds, sensitivity levels, and frame rate to balance detection accuracy with computational load, ensuring smooth operation without sacrificing sensitivity.
5. Monitoring and Analysis: Continuously monitor detected glints, recording their locations, intensity, and frequency. Analyse this data to identify patterns or anomalies that might indicate suspicious activity.
In conclusion, understanding and implementing camera lens glint detection during night photography is a game-changer. By employing the technique outlined in this article, including the strategic use of mock camera placement for deterrence, photographers can significantly enhance their nighttime images. This method ensures that the unique challenges of low-light conditions are met, resulting in sharp, clear photos with minimal glare. Mastery of these techniques opens up a world of creative opportunities for capturing the night’s enchanting landscapes and urban dynamics.