Outdoor Dummy Camera Installation: A Step-by-Step Guide
Outdoor dummy camera installations provide effective security through realistic mimicry of real came…….
Outdoor dummy camera installations provide effective security through realistic mimicry of real cameras. Key steps include choosing a visible, elevated location, preparing tools like a drill and sealant, mounting the housing securely with tight screws, testing camera functionality, and setting it up at eye level with a hidden wire connection for optimal deterrence without complex electronics.
“Uncover the secrets of enhancing outdoor security with an innovative yet simple solution—the outdoor dummy camera housing. This guide delves into the process of installing these realistic-looking decoys, offering a cost-effective way to deter potential intruders.
From understanding the benefits of this technology to choosing the perfect location, we’ll walk you through each step of the Outdoor Dummy Camera Installation process, ensuring your property remains safe and secure.”
- Understanding Outdoor Dummy Camera Housing
- Preparing for Installation: Tools and Location
- Step-by-Step Guide to Outdoor Dummy Camera Setup
Understanding Outdoor Dummy Camera Housing
Understanding Outdoor Dummy Camera Housing
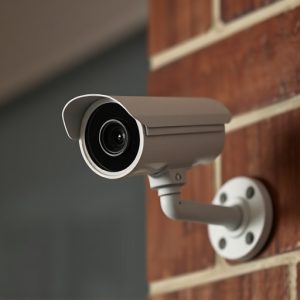
Outdoor dummy camera housing is a sophisticated yet straightforward security solution designed to deter potential intruders. These devices mimic real cameras, providing a visual deterrent without the need for complex electronics or expensive installation processes. By strategically placing a dummy camera, homeowners and business owners can create the illusion of enhanced surveillance, significantly reducing the risk of break-ins and theft.
The installation steps for outdoor dummy camera housing are relatively simple and accessible to most property owners. It involves mounting the housing on a suitable surface, such as a wall or pole, ensuring it’s visible from the street or potential entry points. Once installed, the camera can be adjusted for optimal visibility and angle. Regular cleaning and maintenance, including occasional replacement of the static images or decoys inside, are recommended to maintain its effectiveness and realism.
Preparing for Installation: Tools and Location
Preparing for an outdoor dummy camera installation involves a few key steps and the right tools. Begin by identifying the desired location—a spot with clear visibility, preferably elevated to deter potential tampering. Gather essential tools including a drill, screws suitable for outdoor use, weatherproof sealant, and a dummy camera designed for outdoor conditions. Ensure the area is accessible for maintenance and consider factors like local regulations and privacy concerns before proceeding.
Next, mark the installation points on the surface and drill pilot holes to prevent cracking. Secure the housing firmly with screws, ensuring they are tight but not overly tightened to avoid damage. Apply a bead of weatherproof sealant around the base to seal out moisture and protect against corrosion. Verify the camera’s functionality, aiming it for optimal view, and ensure all connections are secure, completing the outdoor dummy camera installation steps successfully.
Step-by-Step Guide to Outdoor Dummy Camera Setup
Setting up an outdoor dummy security camera is a straightforward process that can significantly enhance your home or business’s security and deter potential intruders. Here’s a step-by-step guide to ensure you get it right:
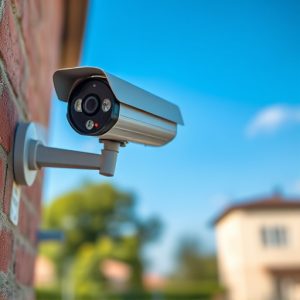
1. Choose the Ideal Location: Select a spot where visibility is optimal, preferably with clear line-of-sight to the areas you want to monitor. Ensure it’s positioned high enough to avoid obstructions and close to an electrical source for easy wiring (even though this guide focuses on a housing without electronics). Consider factors like weather exposure and the camera’s field of view.
2. Prepare the Camera Housing: Remove the dummy camera from its packaging, which typically includes a synthetic shell resembling a real camera. Ensure all parts are intact, including the mounting hardware. Clean the housing to ensure it blends seamlessly with its surroundings, making it more convincing as a genuine security measure.
3. Mount the Dummy Camera: Use the provided brackets or screws to secure the camera at the chosen location. Level it up for accurate viewing. This step is crucial for ensuring the camera appears professional and captures clear footage.
4. Connect Wiring (if applicable): Even though this setup doesn’t involve electronics, a simple wire connection to a power source is necessary. Run a cable from the camera’s power port to an electrical outlet, ensuring it’s concealed for aesthetics and security.
5. Test and Adjust: Once installed, test the camera’s functionality. Ensure it captures footage and that any motion sensors respond as expected. Make adjustments to maximize its effectiveness, like fine-tuning the field of view or sensor sensitivity.
An outdoor dummy camera housing, devoid of electronics, serves as an effective deterrent for potential intruders. By carefully following the installation steps outlined in this guide – from selecting the optimal location and gathering the necessary tools to the final setup – you can enhance your home or business security without the need for complex technology. This simple yet strategic addition to your property’s landscape can significantly contribute to a safer environment, deterring would-be thieves and providing peace of mind.