Guide to Installing & Maintaining Outdoor Wireless Dummy Cameras
Installing outdoor dummy cameras is a straightforward process aimed at enhancing security while pres…….
Installing outdoor dummy cameras is a straightforward process aimed at enhancing security while preserving discretion. Key steps include strategically placing the camera near entry points for clear visibility, securing it stably, connecting to power (with backup battery), testing motion sensor sensitivity, and regularly checking signal strength and angle. Regular maintenance like weatherproofing, inspecting connections, cleaning, and battery replacement ensures optimal performance and accurate motion detection, allowing homeowners to effectively protect their properties without compromising aesthetics.
Wireless dummy cameras equipped with motion sensors are transforming home security. This innovative technology offers a discreet, yet effective solution for deterring intruders without breaking the bank. In this comprehensive guide, we’ll delve into the inner workings of these sophisticated devices, explore the best practices for outdoor installation—including detailed steps to ensure optimal placement—and provide essential maintenance tips to keep your dummy camera operating seamlessly.
- Understanding Wireless Dummy Cameras with Motion Sensors
- Choosing the Right Location for Outdoor Installation
- Step-by-Step Guide to Installing Your Outdoor Dummy Camera
- Maintenance and Care Tips for Optimal Performance
Understanding Wireless Dummy Cameras with Motion Sensors
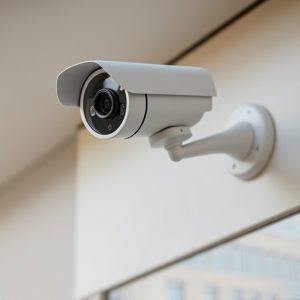
Wireless dummy cameras equipped with motion sensors are a popular choice for outdoor security, offering both discretion and advanced protection. These devices mimic real surveillance cameras, deterring potential intruders while providing peace of mind. Installation typically involves several straightforward steps designed to blend seamlessly into your outdoor environment.
First, select an ideal location for your Outdoor Dummy Camera. This could be a window, door, or any visible spot that discourages unwanted visitors. Next, carefully remove the camera from its packaging and ensure all components are included, including sensors, batteries, and mounting hardware. Then, follow instructions to attach the camera securely while aligning it correctly for optimal coverage. Once fixed, test the motion sensor’s range and sensitivity settings to ensure accurate detection without false alarms.
Choosing the Right Location for Outdoor Installation
When considering outdoor dummy camera installation, choosing the right location is a crucial first step. Opt for an area that offers clear visibility and covers a suitable surveillance range. Positioning your wireless dummy cameras near entry points like doors, windows, or gates is strategic, as it can effectively deter potential intruders. Take into account factors such as natural cover – trees or bushes – to provide concealment while maintaining line-of-sight for optimal camera performance.
During the outdoor installation process, follow these steps: ensure the camera has a stable mount, connect it to a power source (preferably with backup battery), and test its motion sensor sensitivity to avoid false triggers. Regularly verify the camera’s signal strength and angle for comprehensive coverage. By carefully considering location and following these installation guidelines, you’ll maximize the effectiveness of your wireless dummy cameras in enhancing outdoor security.
Step-by-Step Guide to Installing Your Outdoor Dummy Camera
Setting up an outdoor dummy camera is a straightforward process that can be completed in just a few simple steps. First, choose the ideal location for your camera—a spot with good visibility and close proximity to the area you wish to monitor. Ensure it’s secured and stable, either on a wall or a pole, using the mounting hardware provided. Next, unbox your wireless dummy camera and locate the motion sensor settings. These are usually adjustable, allowing you to set sensitivity levels to suit your needs.
Connect the camera to its power source, ensuring it has a reliable and consistent power supply for optimal performance. Then, follow the instructions to pair it with your smartphone or computer via the provided app. Once paired, test the motion sensor by simulating movement in the area monitored by the camera. Adjust settings as needed until you achieve accurate motion detection. Now, you can sit back and enjoy peace of mind, knowing your outdoor space is being vigilantily watched.
Maintenance and Care Tips for Optimal Performance
To ensure your wireless dummy camera with motion sensors performs optimally, proper maintenance and care are essential. Regular cleaning is crucial; use a soft cloth to wipe down the camera’s exterior, removing any dust or debris that might affect its performance. Additionally, check the battery level frequently and replace it as needed, as a dead battery can disrupt the sensor’s operation.
When it comes to outdoor dummy camera installation steps, consider the environment. Protect the device from extreme weather conditions by securing it properly and using weatherproof housings if necessary. Positioning is key; place the camera in an area with clear viewlines and adequate lighting for better motion detection accuracy. Regularly inspect connections and ensure they are secure to prevent any signal interference.
Wireless dummy cameras with motion sensors offer an effective, hassle-free solution for enhancing outdoor security. By following the outlined installation steps and maintaining proper care, you can ensure optimal performance of these innovative devices. Remember, choosing the right location is key, so take your time to assess your property’s needs before setting up your outdoor dummy camera. With regular upkeep, these cameras will provide peace of mind and enhanced safety for years to come.