Mastering Outdoor Dummy Camera Installation: A Comprehensive Guide
Professional-grade outdoor dummy cameras offer a strategic deterrent against intruders, enhancing pr…….
Professional-grade outdoor dummy cameras offer a strategic deterrent against intruders, enhancing property security. To install one effectively: 1. Research local laws and select a clear, visible location with good lighting access. 2. Prepare the surface, secure a stand, and mount the camera at eye level or slightly elevated. 3. Test connectivity and functionality, then connect power and data cables. 4. Configure settings in security system software or an app to tailor motion detection zones and notifications.
“Uncover the power of professional-grade dummy security equipment, particularly outdoor dummy cameras, in enhancing home security. This comprehensive guide delves into the intricacies of these realistic surveillance solutions. From understanding the technology behind high-quality outdoor dummy cameras to a detailed step-by-step installation process, we provide essential knowledge for homeowners seeking advanced protection. Learn how to prepare, plan, and execute the installation of an outdoor dummy camera efficiently.”
- Understanding Professional-Grade Outdoor Dummy Security Cameras
- Preparation and Planning for Dummy Camera Installation
- Step-by-Step Guide to Installing an Outdoor Dummy Camera
Understanding Professional-Grade Outdoor Dummy Security Cameras
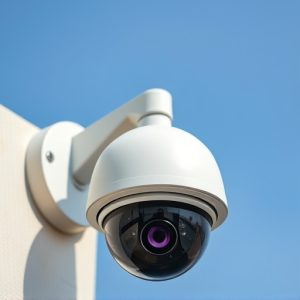
Professional-grade outdoor dummy security cameras are designed to deter potential intruders and provide peace of mind for homeowners and business owners alike. These cameras, while appearing real, serve as a strategic deterrent, mimicking the presence of active surveillance. Understanding their proper installation is key to maximizing their effectiveness.
The Outdoor Dummy Camera Installation process involves several steps: selecting the ideal location for optimal visibility, ensuring it’s within range of your network or power source, and securely mounting the camera. It’s crucial to align the camera’s field of view with areas requiring protection, like entrances, exits, or valuable assets. Additionally, positioning the dummy camera at eye level or slightly elevated can enhance its impact as a deterrent. Proper installation allows these cameras to serve their purpose effectively, acting as a powerful visual reminder that your property is under surveillance.
Preparation and Planning for Dummy Camera Installation
Before installing an outdoor dummy camera, thorough preparation and planning are essential steps in ensuring a successful deployment. Start by researching local laws and regulations regarding security cameras to ensure compliance. Identify the location where the dummy camera will be placed, considering factors such as lighting, visibility, and proximity to potential entry points. Gather all necessary tools and equipment, including mounting hardware, cables, and power sources suitable for outdoor use.
Create a detailed plan outlining each step of the installation process. This includes measuring the distance from the camera to its power source, running cables through appropriate channels or hiding them strategically to prevent damage or detection. Ensure proper placement of the dummy camera, aiming it towards areas requiring surveillance while maintaining an unobstructed view. Test the connectivity and functionality before finalizing the setup to guarantee optimal performance and peace of mind.
Step-by-Step Guide to Installing an Outdoor Dummy Camera
Installing an outdoor dummy camera is a straightforward process that can significantly enhance your property’s security. Here’s a step-by-step guide to help you through the installation:
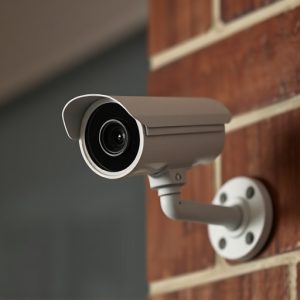
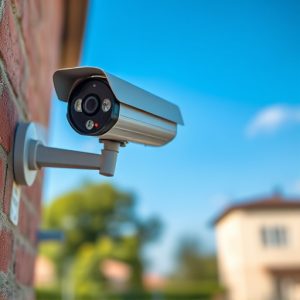
1. Choose the Ideal Location: Select a spot outside your property that offers clear visibility of entry points, such as doors or windows. Ensure it’s well-lit and within view from nearby windows or surveillance points. Consider factors like tree limbs or other obstructions that might block its line of sight.
2. Prepare the Surface: Clear away any debris, plants, or structures that could interfere with the camera’s placement or signal reception. If necessary, use tools to level the surface and secure a sturdy stand for the dummy camera.
3. Mount the Dummy Camera: Carefully attach the camera to its stand, ensuring it’s securely fastened. Adjust the camera’s angle so it faces directly at the targeted area. Test the camera’s functionality by checking video feed on your monitoring system or device.
4. Connect Power and Data: Plug in the power cable to a nearby electrical outlet and connect any required data cables to ensure uninterrupted operation. Some models may use Wi-Fi, while others rely on wired connections for optimal performance.
5. Configure Settings (if applicable): Access your security system software or app to adjust settings like sensitivity, motion detection zones, and notification preferences. Personalize these according to your specific security needs.
Professional-grade outdoor dummy security cameras offer a cost-effective way to enhance home and business security. By understanding the technology, planning meticulously, and following simple installation steps (like those outlined for an outdoor dummy camera installation), property owners can easily add a layer of protection without breaking the bank. These realistic decoys act as a powerful deterrent against potential intruders, serving as both a visual warning and a valuable component in a comprehensive security strategy.