Dummy Camera Bracket Installation Guide: Deter Crime with Realistic Mounts
Dummy camera brackets, as outlined in the Installation Guide, are cost-effective, discreet security…….
Dummy camera brackets, as outlined in the Installation Guide, are cost-effective, discreet security solutions. They mimic real surveillance equipment, deterring crime by creating an illusion of constant observation. Placement strategies vary based on indoor or outdoor settings and aesthetic preferences, focusing on high-visibility areas for maximum impact. The guide emphasizes correct alignment, use of high-quality materials, and secure mounting to avoid damage or exposure, ensuring these brackets serve as effective, unassuming security deterrents.
“Enhance your home or business security with our comprehensive guide to dummy camera bracket installation. Discover the essential role these fake security camera mounting brackets play in deterring crime, and learn how they benefit your system without the cost of real cameras. We’ll walk you through choosing the right bracket, step-by-step installation, optimal placement strategies, and common pitfalls to avoid. By following this Dummy Camera Bracket Installation Guide, you’ll fortify your security while maintaining an aesthetically pleasing environment.”
- Understanding Dummy Camera Brackets: Their Role and Benefits
- Choosing the Right Dummy Bracket for Your Security System
- Step-by-Step Guide to Installing Fake Camera Mounting Brackets
- Placement Strategies for Maximum Deterrence and Aesthetics
- Common Mistakes to Avoid During Dummy Camera Bracket Installation
Understanding Dummy Camera Brackets: Their Role and Benefits
Dummy camera brackets, often overlooked yet crucial components in any security setup, serve as an effective deterrent against theft and vandalism. These realistic-looking replica cameras are designed to mimic the presence of actual surveillance equipment, tricking potential criminals into believing they’re under constant watch. This simple yet powerful strategy significantly enhances security in both residential and commercial spaces.
By strategically placing these dummy camera brackets, you create an illusion of a comprehensive security system. It’s not just about fooling intruders; it’s also a visual reminder that your property is being monitored. For homeowners and businesses alike, a Dummy Camera Bracket Installation Guide can help ensure proper placement, enhancing the overall effectiveness of this cost-efficient security solution.
Choosing the Right Dummy Bracket for Your Security System
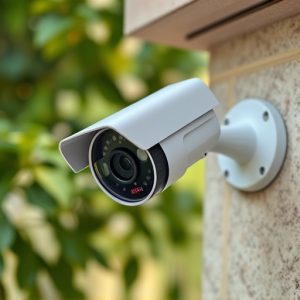
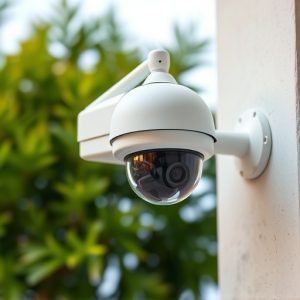
When selecting a dummy camera bracket for your security system, consider your specific needs and the type of setup you’re aiming for. Different brackets offer various advantages in terms of placement flexibility and realism. For indoor spaces with limited visibility, opt for brackets that blend seamlessly into the environment, featuring design elements mimicking real cameras. These can be strategically placed to deter potential intruders without drawing unnecessary attention.
In contrast, outdoor installations benefit from robust, weather-resistant dummy brackets designed to withstand varying climates. These brackets often come with additional features like motion sensors or infrared lighting to enhance their authenticity and deterring effects. Refer to a Dummy Camera Bracket Installation Guide for detailed instructions tailored to your chosen bracket’s design, ensuring optimal placement and maximum security benefits.
Step-by-Step Guide to Installing Fake Camera Mounting Brackets
Installing fake security camera mounting brackets, or dummy camera brackets, can be a straightforward process when followed correctly. Here’s your step-by-step guide to ensure a secure and effective setup:
1. Select the Right Location: Choose a spot that provides clear visibility and aligns with your surveillance needs. Ensure it’s sturdy enough to support the bracket and any connected camera.
2. Measure and Mark: Using a measuring tape, determine the distance from the wall or surface where you plan to mount the bracket. Mark these points accurately for reference.
3. Drill Pilot Holes: Using a drill with the appropriate bit size, create pilot holes at the marked locations. This prevents the screws from splitting the surface and ensures stable mounting.
4. Attach Brackets: Screw in the dummy camera brackets firmly using suitable hardware. Double-check that they’re secure before proceeding to the next step.
5. Position Camera (if applicable): If you’re installing a fake camera along with the bracket, place it within the bracket, ensuring it’s centered and aligned according to your design preferences.
6. Final Checks: Once installed, inspect all connections for stability and adjust as needed. Your dummy camera setup should now provide the desired security camera look without the actual hardware.
Placement Strategies for Maximum Deterrence and Aesthetics
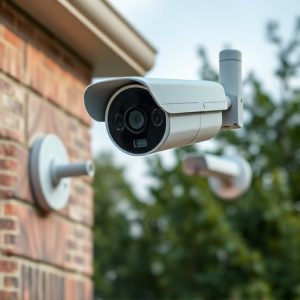
When planning the placement of dummy camera brackets, the primary goal is to strike a balance between maximum deterrence and aesthetically pleasing design. Strategically positioning these devices can significantly enhance security while maintaining the visual appeal of any environment. For optimal results, consider installing them in highly visible areas where potential intruders are likely to notice them. This often includes placing them on corners or near entry points, such as main doors or windows. The goal is to make would-be thieves aware that they are being watched, deterring criminal activity before it occurs.
Aesthetically, the dummy camera brackets should complement the surrounding environment. For residential areas, discreet placement in gardens or along fences can be effective without overpowering the natural beauty of the space. Commercial settings may opt for more robust, industrial-style brackets that blend with parking lots or outdoor seating areas. Following a Dummy Camera Bracket Installation Guide ensures that these devices are securely mounted, reducing the risk of them being damaged or displaced by weather conditions or deliberate attempts to remove them, thereby maximizing their effectiveness as a deterrent.
Common Mistakes to Avoid During Dummy Camera Bracket Installation
When setting up fake security camera brackets, it’s crucial to avoid common pitfalls that can undermine the realism and effectiveness of your installation. One major mistake is neglecting proper alignment; ensure the bracket’s position mimics actual camera mounting, aligning with walls, corners, or ceilings accurately. Improper placement can give away the deception instantly.
Another error is using low-quality materials or generic brackets that lack the subtlety required for a convincing dummy setup. Opting for cheap options may result in visible flaws and an unrealistic appearance. Choose brackets designed specifically for fake camera installations, considering factors like texture, paint finish, and overall design to blend seamlessly with genuine security equipment.
A well-placed dummy security camera can serve as a powerful deterrent, enhancing your home or business security. By following this Dummy Camera Bracket Installation Guide, you’ve learned how to strategically position these brackets for maximum effect. Remember, the key is realism and placement; ensuring both function and aesthetics are met. With the right dummy bracket, you can create a comprehensive security system that keeps potential intruders at bay.