Dummy Camera Bracket Installation Guide: Night Vision Secrets Unveiled
The text emphasizes the importance of a Dummy Camera Bracket Installation Guide for optimizing infra…….
The text emphasizes the importance of a Dummy Camera Bracket Installation Guide for optimizing infrared night vision camera security systems. These cameras, with their cost-effectiveness and accessibility, enhance surveillance in low-visibility areas, deterring theft and vandalism. The guide offers detailed instructions on bracket placement, ensuring clear images via precise field of view adjustments, seamless power source integration, and cable management. By following these steps, users can easily install and maintain dummy cameras, making them ideal for both residential and commercial security without requiring professional setup services. Regular cleaning and troubleshooting based on power connections and infrared functionality are key to keeping the devices operational.
“Uncover the power of dummy cameras equipped with infrared night vision, a game-changer in home security. This comprehensive guide explores the intricate world of these unassuming yet formidable devices. From understanding their unique capabilities to installing and maintaining them, we provide a detailed Dummy Camera Bracket Installation Guide. Discover the benefits, explore real-world applications, and learn simple tips for optimal performance. Enhance your security with this practical step-by-step approach.”
- Understanding Dummy Cameras with Infrared Night Vision
- Benefits and Applications of Dummy Camera Brackets
- Step-by-Step Guide to Installing Dummy Camera Bracket
- Maintenance and Troubleshooting Tips for Optimal Performance
Understanding Dummy Cameras with Infrared Night Vision
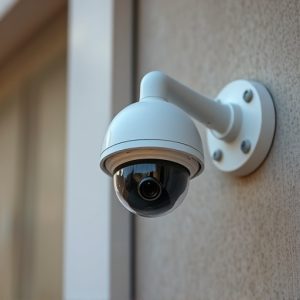
Dummy cameras with infrared night vision are a popular choice for security and surveillance, especially in areas where visibility is low or during nighttime hours. Understanding how these devices work and their proper installation is key to maximizing their effectiveness. A Dummy Camera Bracket Installation Guide can be a valuable resource for both professionals and DIY enthusiasts looking to set up this technology.
These cameras utilize infrared LEDs to illuminate the surrounding area, allowing them to capture clear images even in complete darkness. The bracket installation process involves strategically placing the camera at an optimal angle, ensuring it has a clear line of sight without any obstructions. By following a detailed guide, users can learn how to adjust the bracket for the best field of view, consider factors like power sources and cable management, and ultimately integrate these cameras into existing security systems seamlessly.
Benefits and Applications of Dummy Camera Brackets
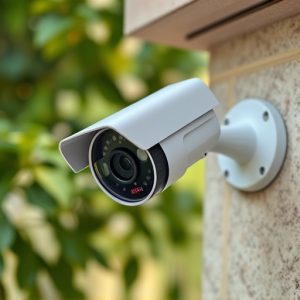
Dummy camera brackets offer a multitude of benefits for both professional security installations and DIY enthusiasts. By strategically placing these devices, users can enhance their surveillance capabilities significantly. One of the primary advantages is their ability to simulate active camera systems, deterring potential intruders by creating the illusion of constant monitoring. This is particularly effective in outdoor settings, where visible cameras are less common, making dummy brackets an affordable alternative to full-fledged security setups.
The applications of these brackets span various scenarios. They can be installed on walls, fences, or even trees to monitor entrances, driveways, and perimeters. In residential areas, they act as powerful deterrents against theft and vandalism. Commercially, dummy camera brackets can contribute to the overall security of businesses, schools, and public spaces. Moreover, these brackets are easy to install, requiring only basic tools and following a straightforward Dummy Camera Bracket Installation Guide. This accessibility makes them an appealing option for those seeking cost-effective security solutions without professional setup services.
Step-by-Step Guide to Installing Dummy Camera Bracket
Setting up a dummy camera with infrared night vision is a straightforward process, especially with the right bracket installation guide. Here’s a step-by-step approach to ensure your camera is securely mounted and ready for use:
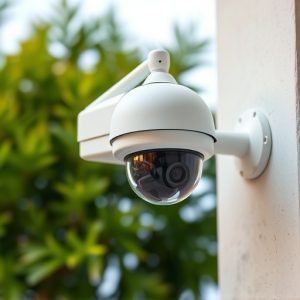
1. Choose the Ideal Location: Select a spot that offers unobstructed views of the area you wish to monitor. Consider factors like lighting, proximity to potential targets, and any obstructions that might affect the camera’s field of view. Once you’ve decided on a location, ensure it’s within reach for installation.
2. Select the Dummy Camera Bracket: Opt for a bracket designed specifically for your dummy camera model. The right bracket will have the necessary mounting points and may include adjustable arms or joints to customize placement. Ensure it’s made from durable materials that can withstand outdoor conditions if the camera is exposed to different weather.
3. Prepare the Surface: Clean the area where you’ll attach the bracket. Remove any dust, dirt, or debris using a soft cloth or brush. If necessary, apply a suitable adhesive or use screws for a more permanent fix, following manufacturer recommendations.
4. Mount the Bracket: Securely attach the bracket to the chosen surface. Ensure it’s level and aligned correctly. Use all available mounting points on both the bracket and your camera to distribute weight evenly.
5. Attach the Dummy Camera: Carefully place your dummy camera onto the bracket, ensuring it fits snugly. Line up the camera’s lens with the intended view target. Tighten any screws or fasteners gently but firmly to hold the camera in position.
6. Connect Night Vision Functionality (if applicable): If your dummy camera has infrared night vision capabilities, ensure these are activated and properly aimed at the desired area. Some models may have adjustable settings for sensitivity and field of view.
Maintenance and Troubleshooting Tips for Optimal Performance
Proper maintenance is key to ensuring your dummy camera with infrared night vision functions flawlessly. Regular cleaning, especially of the lenses, is crucial to maintaining clear and sharp images. Use a soft cloth dampened with distilled water or isopropyl alcohol to gently wipe down the exterior and lens. Avoid using abrasive materials or harsh chemicals that could damage the camera’s sensitive components.
When troubleshooting issues, start by checking power connections, ensuring all cables are securely plugged into both the camera and power source. Verify the infrared LED lights are illuminating during night vision mode. If the camera isn’t recording or transmitting footage as expected, consult the manufacturer’s guide or a Dummy Camera Bracket Installation Guide for step-by-step troubleshooting procedures tailored to your specific model. Regular maintenance and quick problem-solving can help extend the lifespan of your device, keeping it ready for action when you need it most.
Dummy cameras with infrared night vision offer a cost-effective security solution, especially in hard-to-reach or poorly lit areas. By understanding their functionality and benefits, you can effectively utilize these devices with the help of our comprehensive Dummy Camera Bracket Installation Guide. With proper maintenance and troubleshooting tips, ensure optimal performance and peace of mind knowing your property is well-protected.