Wireless dummy cameras with motion sensors have revolutionized outdoor home security, offering discreet and advanced surveillance solutions. These cameras mimic real devices, deterring intruders while providing peace of mind. They include weatherproof casings, integrated motion sensors, and wireless connectivity to capture high-resolution images or videos upon detecting movement, which are sent to a connected smartphone or security system. Installation involves following the Outdoor Dummy Camera Installation Steps, optimal mounting height and angle adjustments, proper internet connection for seamless transmission, and strategic placement in well-lit areas with minimal human traffic. Regular maintenance includes lens cleaning, sensor area inspection, securing mounting, and adjusting sensitivity to prevent false triggers.
“Uncover the power of wireless dummy cameras equipped with motion sensors for enhanced home security. This comprehensive guide delves into the technology behind these innovative devices, offering insights on choosing the ideal outdoor installation spots. Learn the step-by-step process of setting up your own wireless dummy camera system, from initial placement to fine-tuning settings for optimal performance. Discover maintenance tips to ensure these cameras remain vigilant guardians of your property.”
- Understanding Wireless Dummy Camera Technology
- Choosing the Right Outdoor Location for Installation
- Step-by-Step Guide to Installing Your Wireless Dummy Camera
- Maintaining and Optimizing Performance of Wireless Dummy Cameras with Motion Sensors
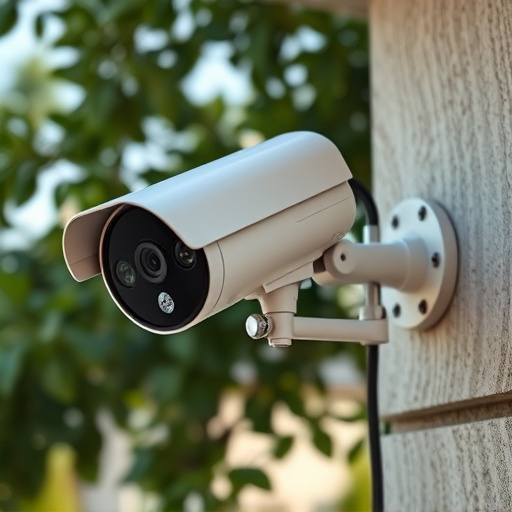
Understanding Wireless Dummy Camera Technology
Wireless dummy cameras with motion sensors have revolutionized home security, offering a sophisticated and discreet solution for outdoor surveillance. These innovative devices mimic real cameras, deterring potential intruders while providing peace of mind. The technology behind them is quite simple yet effective. Typically, an outdoor dummy camera consists of a weatherproof casing, an integrated motion sensor, and wireless connectivity. When the sensor detects movement, it triggers the camera to capture high-resolution images or videos, sending them wirelessly to a connected smartphone or security system for immediate review.
The installation process for these cameras is straightforward, often referred to as Outdoor Dummy Camera Installation Steps. It involves mounting the camera at an optimal height and angle to cover your desired area. Many models come with adjustable features, allowing you to customize their placement. Once installed, ensure a stable internet connection is available to enable wireless transmission. With proper setup, these cameras can provide 24/7 monitoring, enhancing security without compromising privacy or aesthetics.
Choosing the Right Outdoor Location for Installation
When selecting an outdoor location for installing wireless dummy cameras with motion sensors, consider areas that require surveillance but have limited human presence to avoid false triggers. Opt for well-lit spots where the camera can capture clear images, ideally with a view of common entry points or potential risk areas.
Follow these outdoor dummy camera installation steps: choose a location near power sources for hassle-free wiring, ensure stable internet connectivity, and position the device at eye level or slightly elevated to maximize field of view. Keep it away from obstructing objects like trees or buildings that might hinder its operational effectiveness.
Step-by-Step Guide to Installing Your Wireless Dummy Camera
Setting up a wireless dummy camera with motion sensors is an easy process that can significantly enhance your home security. Here’s a step-by-step guide specifically tailored for outdoor dummy camera installation:
1. Select the Ideal Location: Choose a strategic spot outdoors where you want to install the camera, ensuring it has a clear view of the area you wish to monitor. Consider factors like lighting, proximity to entry points, and potential obstacles that might obstruct the camera’s line of sight.
2. Unbox Your Wireless Dummy Camera: Carefully remove all components from the packaging, including the camera body, motion sensor, power adapter, and mounting hardware. Take a moment to familiarize yourself with each part and its function before beginning installation.
3. Mount the Camera: Using the provided brackets or screws, securely mount the camera on a wall or pole, ensuring it is angled correctly for optimal viewing. Ensure the camera is weatherproof and protected from environmental elements if installed outdoors.
4. Connect the Motion Sensor: Attach the motion sensor to the desired area, such as a fence post or tree trunk. The sensor should be positioned to detect movement within the camera’s field of view. Follow the manufacturer’s instructions for optimal sensor placement.
5. Power Up and Sync: Plug in the power adapter and turn on the camera. Most wireless dummy cameras have a simple setup process, often involving connecting to your home network via Wi-Fi or Bluetooth. Follow the on-screen prompts to pair the camera with your mobile app, allowing you remote access and control.
6. Test Motion Detection: Once installed and powered up, test the motion sensor by simulating movement within its range. Check that the camera triggers alerts or recordings as expected through your connected app.
Maintaining and Optimizing Performance of Wireless Dummy Cameras with Motion Sensors
Maintaining and optimizing the performance of wireless dummy cameras with motion sensors involves a few key steps, especially for outdoor installations. First, ensure regular cleaning of the camera lens to prevent any buildup of dirt or debris, which can significantly impact image quality. Use a soft cloth or brush designed for camera lenses to avoid scratches. Additionally, check the sensor area periodically for any signs of damage or obstruction, clearing away any leaves or insects that might block its view.
Second, verify the stability and secure mounting of the camera. Outdoor environments often present varying weather conditions and potential physical impacts. Ensure all connections are tight, and consider using additional fasteners or brackets to fortify the camera’s position. Regularly test the motion sensor’s sensitivity and adjust it as needed based on local wildlife or environmental factors to prevent false triggers while ensuring effective security monitoring.
Wireless dummy cameras equipped with motion sensors offer an effective security solution for outdoor spaces. By understanding their technology, selecting the ideal installation location, and following simple setup steps (like those outlined in our comprehensive guide), you can easily deploy these devices. Regular maintenance and adjustments ensure optimal performance, providing peace of mind and enhanced safety for your home or business. Implement these steps for a successful outdoor dummy camera installation and enjoy a secure environment.