Solar-powered dummy camera systems offer an eco-friendly security solution with straightforward installation. Planning involves assessing security needs, identifying areas, and obtaining permits. Proper placement ensures clear views at eye level or slightly elevated. Post-installation, configure settings and test the network rigorously. Regular maintenance includes checking for damage, cleaning lenses, inspecting solar panels, and testing battery levels.
“Elevate your home or business security with a Solar-Powered Dummy Camera System—an effective, eco-friendly alternative to traditional surveillance. This comprehensive guide walks you through every step of installation, from understanding the benefits of solar-powered dummy cameras to configuring and testing your mock surveillance network. Learn best practices for planning, physical setup, maintenance, and troubleshooting, ensuring optimal performance. Discover how these cameras can deter crime and provide peace of mind, all while harnessing the power of the sun.”
- Understanding Solar-Powered Dummy Camera Systems
- Planning and Preparation for Installation
- Physical Setup and Placement of the Solar Cameras
- Configuring and Testing the Mock Surveillance Network
- Maintenance and Troubleshooting Tips
Understanding Solar-Powered Dummy Camera Systems
Solar-powered dummy camera systems are an innovative and eco-friendly option for home or business security, offering a unique approach to surveillance. These cameras utilize solar energy, drawing power from sunlight, which not only reduces installation costs but also minimizes environmental impact. The system typically consists of a solar panel, a battery pack, and a high-definition dummy camera. The solar panel charges the battery during daylight hours, ensuring continuous operation even without access to mains electricity. This makes them ideal for remote locations or areas with limited power infrastructure.
The installation process is straightforward and involves strategically placing the solar panel in an area receiving ample sunlight and mounting the camera at a suitable height. These cameras are designed to mimic real security cameras, providing a visual deterrent to potential intruders without the need for complex wiring or costly infrastructure. They offer peace of mind, enhanced security, and a sustainable solution, making them a popular choice for those seeking advanced yet cost-effective surveillance options.
Planning and Preparation for Installation
Before installing a solar-powered dummy camera system, meticulous planning and preparation are essential. Start by assessing your security needs and identifying the areas that require surveillance. Consider factors like lighting conditions, obstructions, and potential angles for optimal camera placement. Obtain any necessary permits or approvals from local authorities to ensure compliance with regulations. Additionally, research and select high-quality solar cameras suitable for your environment, ensuring they are durable, weatherproof, and equipped with advanced features like motion detection and night vision.
Prepare the installation site by clearing debris and ensuring easy access. Verify that the chosen location receives ample sunlight for efficient charging of the solar panels. Mark out the camera positions and verify their visibility to prevent blind spots. Gather all necessary tools and equipment, including ladders, drill bits, wiring, and connectors. Ensure proper grounding and electrical safety measures are in place to protect against potential hazards during installation.
Physical Setup and Placement of the Solar Cameras
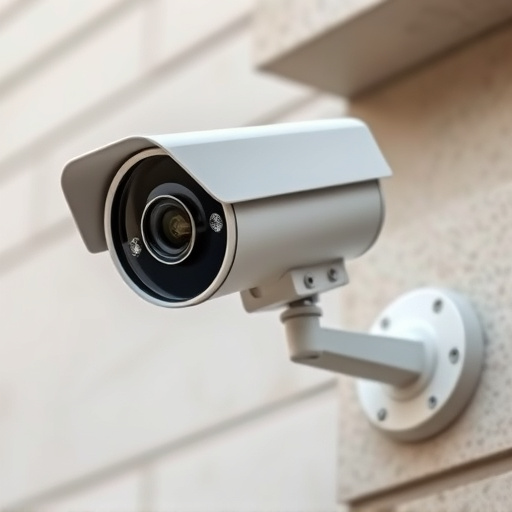
When setting up a solar-powered dummy camera system, the physical placement and orientation of the cameras are crucial for optimal performance. Install them in areas with unobstructed views, ensuring the lenses are free from shadows and debris. Typically, these cameras perform best when positioned at eye level or slightly elevated to capture clear images and videos. Walls, fences, or poles can serve as suitable mounts, allowing for adjustable placement according to your surveillance needs.
Consider factors like lighting conditions and potential obstacles when choosing camera locations. Solar-powered dummy cameras are ideal for outdoor use, so place them in areas exposed to direct sunlight during the majority of the day to ensure optimal energy generation and video quality. Proper positioning will enhance the system’s effectiveness as a deterrent and surveillance tool.
Configuring and Testing the Mock Surveillance Network
After successfully installing the solar-powered dummy cameras, the next step is configuring and testing your mock surveillance network. This involves setting up each camera’s settings, including resolution, motion detection sensitivity, and notification preferences. Ensure that all cameras are connected to your central control unit or app, allowing for remote access and monitoring.
During testing, verify that motion triggers accurately activate the cameras, capturing clear footage when movement is detected. Check the quality of the video feed, ensuring it meets your requirements. Additionally, test the audio functionality, if available, to confirm real-time communication through the system. Regularly simulating various scenarios will ensure the mock surveillance network operates as intended, providing a reliable security simulation solution for your premises.
Maintenance and Troubleshooting Tips
Maintaining a mock surveillance system, especially a solar-powered dummy camera installation, requires minimal effort but regular checks. Begin by inspecting the cameras for any signs of physical damage or obstructions that might hinder their view. Clean the lenses gently using a microfiber cloth to ensure optimal image quality. As these cameras rely on sunlight for power, it’s crucial to verify the solar panels’ functionality. Check if they are free from debris and aligned properly with the sun. Regularly test the battery levels, especially during shorter or cloudier days, to ensure continuous operation.
Troubleshooting common issues can be straightforward. If a camera stops recording, double-check connections and power supply. Ensure the device is receiving adequate sunlight. Many solar-powered cameras have motion sensors; if these aren’t functioning, verify settings and consider cleaning the sensor area. In case of connectivity problems, refer to the user manual for network setup instructions or consult with your service provider. Remember, regular maintenance will keep your system running smoothly and effectively.
Setting up a solar-powered dummy camera system is a straightforward process that can significantly enhance your home or business’s security. By following this comprehensive guide, from understanding the technology behind solar-powered cameras to troubleshooting common issues, you’ve now equipped yourself with the knowledge to install and maintain an effective mock surveillance network. Remember, these systems offer a cost-efficient and environmentally friendly way to monitor your surroundings, providing peace of mind and enhanced safety without breaking the bank.